Music

POWERSPEDAL "THE SUCKER!" - Dying Battery Simulator by Andrew B. Powers

POWERSPEDAL "THE SUCKER!" - Dying Battery Simulator

The POWERSPEDAL “THE SUCKER!” emulates the effect of a dying 9V battery on guitar effect pedals.

My dying battery simulator pedal is the perfect solution for guitarists, who love the sound of their analog guitar effect pedals as the power of the battery starts to sag.

For example, many fuzzes sound better when the battery is empty and no longer supplies 9V. With THE SUCKER! you can easily do this all the time! Maybe it sounds a bit crazy, but it can sound pretty damn cool!

One of the biggest challenges in achieving the perfect “dying battery sound” is the lack of consistency. With THE SUCKER! you can dial in that perfect sound with precision every time. You also won't have to wait until your battery gets low to achieve those sought-after sounds. Simply plug your guitar effect pedal into THE SUCKER! and you're ready to go - and even with the power supply unit that you have been using for the power supply of your effect pedals.

POWERSPEDAL "THE SUCKER!" - Dying Battery Simulator

With the big knob, you can have precise control over the voltage of the plugged-in effect pedal and achieve the perfect sound for your needs. The digital voltage meter display, can easily monitor the power supply of your effect pedal and you can see exactly what voltage is perfect for effect pedal and your individual sound.

Please note: The dying battery simulator is intended only to be used with analog pedals. Digital pedals typically require more power and don’t generally function properly on lower power. They may even be damaged by being used with lower power.

THE SUCKER! works with standard “BOSS style” center-negative (2.1mm x 5.5mm) power supplies and include a male-to-male power patch cable to connect your effect pedal.

POWERSPEDAL "THE SUCKER!" - Dying Battery Simulator

Specifications:
Power supply: 9V DC
Power output: Range of approximately 2 to 9 volts
Dimensions (case): 3.65in x 1.52in x 1.22in // 93mm x 39mm x 31mm
Weight: 5.0oz // 142g

Box content:
- The POWERSPEDAL “THE SUCKER!”
- Male-to-Male power patch cable (2.1mm x 5.5mm, center-negative)

POWERSPEDAL "THE SUCKER!" - Dying Battery Simulator

Designed and handwired with ❤️ in the California and England.

Order yours today and experience the difference it can make in your audio setup!

Check out this great guitar effect pedals too


If you have any questions, please drop me a message!

Best earplugs for concerts, festivals, sporting & other loud events by Andrew B. Powers

Cool concert Kid with Ear Protection

If you're searching for the best earplugs for loud events, I’ve got you covered.

As a professional music photographer, I work around loud music constantly and have tried everything from cheap foam earplugs to custom-molded ones costing hundreds.

This article breaks down my top earplug recommendations based on the level of noise protection, comfort, and ease of use.

How is sound measured?

Sound is measured with decibels, also written as “dB”. The decibel scale ranges from 0 dB to 300 dB. Zero represents absolute silence, whereas three hundred represents the loudest sound in the world.

Loudest sounds in the world

Some of the loudest sounds in the world include a AC/DC concert (135 dB), gunfire (155 dB), NHRA Dragsters (160 dB), Space Shuttle lunch (165-170 dB) a 1-ton TNT bomb (210 dB) and a 5.0 Earthquake (235 dB). The loudest sound ever recorded was the Tunguska Meteor at 300-315 dB.

Why wear hearing protection?

The threshold for physical pain from loud noises is 120 dB. Hearing loss can happen from extended exposure to nearly any noise, but anything over 100 dB can cause damage within minutes.

How loud is too loud?

The safe statutory limit for noise exposure is 80 decibels (dB). Regular exposure to noise above this level can lead to irreversible hearing damage. At concerts, noise levels can reach up to 120 dB, which is very harmful.

Safe Exposure Limits Before Risk of hearing loss


Signs of Hearing Loss

There are many signs that humans show when their hearing begins to deteriorate. These signs included ear pain, ear itching, muffled hearing, pus leaking from the ear, tinnitus, as well as having a difficult time hearing what people say.

The question is, which earplugs will work best for you as a concert photographer?

With so many options on the market, ranging from $5 to $500, it can be hard to choose the right pair. After testing various earplugs, here are my top recommendations - let’s dive into my top picks in more detail:

Eargasm - High Fidelity

The Eargasms are my top pick for advanced earplugs. They come in two sizes and are the only triple-flange silicone earplugs that fit every ear canal perfectly. With a noise reduction rating of -21 dB, they offer some of the best protection in this price range. Plus, they come with a sleek aluminum case to keep your earplugs safe.

Alpine - MusicSafe Pro

I’ve used the Alpine Music Pros for years, and they’ve been incredibly reliable. They're unique in offering three interchangeable filter sets for low, medium, and high protection, with the high-protection filter being my go-to. The double silicone flange provides a great fit and long-lasting comfort (for example on concert tournaments). Offering sound protection between -16 to -18 dB, they come in one size and include a handy plastic storage box. If you’re ready to invest in top-quality earplugs, the Alpine Music Safe Pros are a winner—they even won the Red Dot Award 2015.

Etymotic - ER20 ETY & ER20SX

For concerts that last around 1-3 hours, I recommend using “musician’s earplugs” such as the Earaser, Etymotic ER20XS, or Eargasm High Fidelity Earplugs. These models are specifically designed to let you enjoy the music at safer levels, while maintaining sound clarity and avoiding the muffled distortion that comes with traditional hearing protection. They’re easy to insert and remove, which is perfect for taking them out between sets when chatting with friends, unlike foam options. Plus, they’re reusable, making them a great value for regular concert-goers.

Etymotic ER20 ETY

Etymotic ER20SX

Etymotic - ER125-MPE

The Etymotic Music Pro Elite Rechargeable Active Hearing Protection is a cutting-edge solution for musicians who want to hear naturally while protecting their hearing. It uses active technology to constantly evaluate incoming sound and offers two modes of operation. In Low Mode, it provides transparent audio for sounds under 90 dB, while offering 15 dB of attenuation when sound exceeds 90 dB, reducing only the loudest sounds without distorting the rest. In High Mode, it delivers a 6 dB audio boost for sounds below 90 dB and 9 dB of attenuation for louder sounds, ensuring precise protection. The earbuds offer an impressive 16-20 hours of use per charge, with the case providing 15+ additional charges.

The overall sound experience was superb and natural and the different filter tips which are delivered with the earplugs, will ensure you’ll find the right fit for you. The drawback of the Music Pro is the amount of work you have to go through to enjoy their benefits.

HEAROS - Ultimate Softness

If you want to truly enjoy the music at a concert or festival and are standing some distance from the big speakers, or only exposed to high volumes for a short period, I recommend the musician's earplugs mentioned above. They offer excellent sound clarity while protecting your ears from harmful noise levels.

But if you're spending really long periods of time near the stage, especially near the speakers, I'd recommend foam options like the Hearos Ultimate Softness Series. These have 32dB noise reduction and offer better long-term comfort compared to other options like the Eargasm High Fidelity, Alpine MusicSafe Pro and the Etymotic. The added protection makes a big difference, especially at multi-day festivals where loud music can be heard for extended periods of time.

Summary

Most people would benefit from a pair of Etymotic ER20 ETY & ER20SX for almost any occasion, or the Hearos Ultimate Softness Series earplugs when maximum noise protection is needed. If you're a musician or professional music photographer around loud music regularly, it's worth investing in Eargasm High Fidelity or Alpine MusicSafe Pro.

However, it's best to invest in custom earplugs, even at a price of $200 or more.

Shopping List of the products I’ve mentioned

All available on Amazon. If you click through and make a purchase, I may earn a small commission at no additional cost to you. I only recommend products that I personally use and believe in!


Do you have any recommendations or personal guidelines that you find helpful?

Please feel free to comment and share your thoughts on “Best earplugs for concerts, festivals, sporting & other loud events”.


If you like my work or the free stuff and want to say thank you, please use this opportunity now and

 
Buy Me a Coffee at ko-fi.com
 

THANK YOU, very much! 🙏🏻


POWERSPEDAL “POWERSNABO - Nasty Bomb” (Overdrive Guitar Effect Pedal) by Andrew B. Powers

The “POWERSNABO - Nasty Bomb” - An absolute recommendation if fat, rocking riffs are your thing and if you love to having a great time with your guitar.

"POWERSNABO - Nasty Bomb", a guitar pedal effect (from the POWERSPEDAL series) meticulously crafted by Andrew B. Powers, is an overdrive that takes tonal excellence to the next level, which rather boldly claims to beat all the others! Sonically most overdrives can sound thin or lack a "certain something” - This is where the "POWERSNABO - Nasty Bomb" comes in. This allows you to hit the sound of an amplifier that is about to explode.

The sounds produced are not only inspiring, they are extremely addictive!

The heart of this awesome effect pedal is a special "engine" inside, cascading that tone filled gain from input to output and tuned to deliver maximum tonality for as wide a range of amps as possible.

With effective knob twiddling you will achieve overdrive tonal perfection, from subtle through to searing, think slightly hairy blues to hard rock.

The first three controls VOLUME, GAIN and TONE are self-explanatory. Meanwhile, a fourth control, CALIBER, sets the level of a secondary overdrive stage that cascades with the first drive section. With effective knob twiddling you will achieve tonal perfection.

Like a tube amp, the "POWERSNABO - Nasty Bomb" is responsive to your guitar’s controls and the sensational responsiveness of this effect pedal makes using the Volume and Tone knobs to add and remove distortion particularly rewarding.

Key Features:
- Controls: VOLUME, GAIN, TONE, CALIBER
- True-bypass switch
- Status LED
- Built to withstand the rigors of live performance
- Handcrafted
- Unique serial number

Specifications:
Power supply (not included): 9V DC
Input: 1/4" // 6.35mm TS (mono) jack
Output: 1/4" // 6.35mm TS (mono) jack
Dimensions (case): 4.75in x 2.61in x 1.42in // 121mm x 66mm x 36mm
Weight: 9.67oz // 274g

Box content:
- The “POWERSNABO - Nasty Bomb” guitar effect pedal

Designed and handwired with ❤️ in the California and England.

Order yours today and experience the difference it can make in your audio setup!

Check out this great guitar effect pedals too


If you have any questions, please drop me a message!

Metering & Exposure - Concert photography 101 - Part 2 by Andrew B. Powers

Neaera (Benny Hilleke, Tobias Buck, Sebastian Heldt, Benjamin Donath, Stefan Keller), German Melodic-Death-Metal/Metalcore-Band

In the first part of this series, I covered my basic four-step approach to determining exposure and also mentioned that I don't rely on in-camera light meters.

My four-step method is an excellent foundation for determining exposure in concert lighting. With practice, you can achieve accurate exposure even as light levels shift, without needing constant review and adjustment. Once you've mastered setting a baseline exposure, as explained in the previous article, you're ready to take your skills to the next level.

In this second installment, I'll share some other techniques that I use in addition to this feedback method.

These three approaches to metering and exposure for concert photography are designed to boost efficiency. With three-song limits becoming the norm, the more time you spend looking through the viewfinder rather than at the LCD, the better.

Please notice:

In addition, dealing with the least number of variables possible will help you with the next technique: memorization.

Facilitate

When I shoot, I strive to keep my exposure settings consistent across different lighting setups. More options don’t always lead to better decisions, and simplifying my approach allows me to focus on the shot itself rather than unnecessary adjustments. The fewer settings you need to adjust, the faster and more efficiently you can work.

By minimizing the amount of information you need to manage and narrowing your options, you achieve a level of simplicity while still retaining the flexibility of manual control.

Memorize

Just as music follows patterns, the design of concert lighting does as well. A lighting technician often revisits the same lighting scheme multiple times throughout a set, sometimes even several times within a single song.

One effective technique for improving your metering workflow in the stage pit is to develop the habit of memorizing the exposure settings.

As lighting settings repeat, having already memorized the exposure for a specific scheme will save you time and allow you to focus on capturing awesome photos rather than getting bogged down by a bunch camera settings.

Anticipate

Believe it or not, your eyes and brain can serve as highly capable and responsive judges of ambient light. Training them can significantly enhance your ability to achieve more accurate and consistent light metering.

In fact, the first step to internalizing light levels is something you’re likely already practicing in the stage pit and even before the show begins: Guessing!
The estimated of the lamount of light is already part of your feedback loop - so make it count and enhance your skills in making those estimations more and more accurate.

Final note

The goal of using these techniques is to reduce the steps between envisioning the shot and capturing it and allowing you to achieve optimal exposure with minimal effort - in a nutshell, this enables you to work as efficiently as possible. By combining all these tricks, you'll be able to adjust exposure on the fly and keeping the post-processing workload to a smal level.

Also check out

Do you have any recommendations or personal guidelines that you find helpful?

Please feel free to comment and share your thoughts on “Metering & Exposure - Concert photography 101 - Part 2”.


If you like my work or the free stuff and want to say thank you, please use this opportunity now and

 
Buy Me a Coffee at ko-fi.com
 

THANK YOU, very much! 🙏🏻


Metering & Exposure - Concert photography 101 - Part 1 by Andrew B. Powers

Singer and musician Joey Cape, also frontman of the California punk rock band Lagwagon.

Capturing the perfect exposure in concert photography is one of the biggest challenges, whether you're a novice or an experienced pro.

From the dim, moody lighting of intimate club gigs to the intense, blinding lights of arena shows - navigating these extremes requires skill and precision. However, finding the right exposure isn’t as difficult as it might seem.

Here’s my guide to determining the best exposure settings for concert photography

The following is my standard process for setting exposure, which I always perform in manual mode at the beginning of a set.

1.) Take a test shot

For this test frame, I'll estimate the exposure based on the venue's lighting conditions. Typically, I set the aperture around f/2.8 or f/3.2 and a shutter speed of 1/160, with ISO ranging between 1600 and 6400.

2.) Check histogram & image

That's right, chimp it up. In reviewing the above test frame, I'll look at both the histogram and overall rendition of the image. With the latter, it's important to use a camera with a fairly accurate LCD, otherwise one can be misled. I'll also review the areas of blown highlights to ensure that important details are intact in the subject.Of the four steps, this is both the most difficult and the most important. The good thing is, if you blow it, you've always got another shot.

3.) Refine & retry

Is the photo too bright or too dark? Return to step one and make adjustments as needed. Tweak the ISO, shutter speed, or aperture - whatever it takes. Once you've perfected it, move on to the final step.

4.) Set it up, relaxe

Once you've found the ideal exposure for the current lighting, use those settings as your reference and focus on capturing photos - there's no need to overthink the technical details anymore. From this point, it's best to adjust only one setting as needed. I primarily focus on adjusting the shutter speed, even during performances, unless the conditions have changed drastically.

If the lighting conditions change - they inevitably will - and you still feel uncertain about your settings, simply return to the first step and repeat the process from the beginning.

Please notice:

I didn't talk about the different in-camera exposure methods or any automatic mode for a reason.

Any experienced photographer will tell you that light meters can be unreliable; they are rarely 100% accurate for any scene or situation. Because the camera can never truly know which part of the composition is most important or where the exposure needs to be prioritized. This is especially true for concert photography, where lighting can be particularly difficult.

Final note

This four-step system offers a strong foundation for finding the correct exposure settings, even in challenging conditions like intense strobes, powerful spotlights and rapid shifts in the overall lighting design. In these cases, it's crucial to adjust the shutter speed very quickly to stay in sync with the changing light. However, with enough practice and experience, this will become second nature and shouldn’t be an issue.

In the next installment of this two-part series, I will delve deeper into the additional techniques that I use alongside this routine to ensure optimal exposure while photographing a concert.

Also check out

➡️ Metering & Exposure - Concert photography 101 - Part 2

Do you have any recommendations or personal guidelines that you find helpful?

Please feel free to comment and share your thoughts on “Metering & Exposure - Concert photography 101 - Part 1”.


If you like my work or the free stuff and want to say thank you, please use this opportunity now and

 
Buy Me a Coffee at ko-fi.com
 

THANK YOU, very much! 🙏🏻


POWERSSUMO - MIDI Sustain & Modulation Pedal by Andrew B. Powers

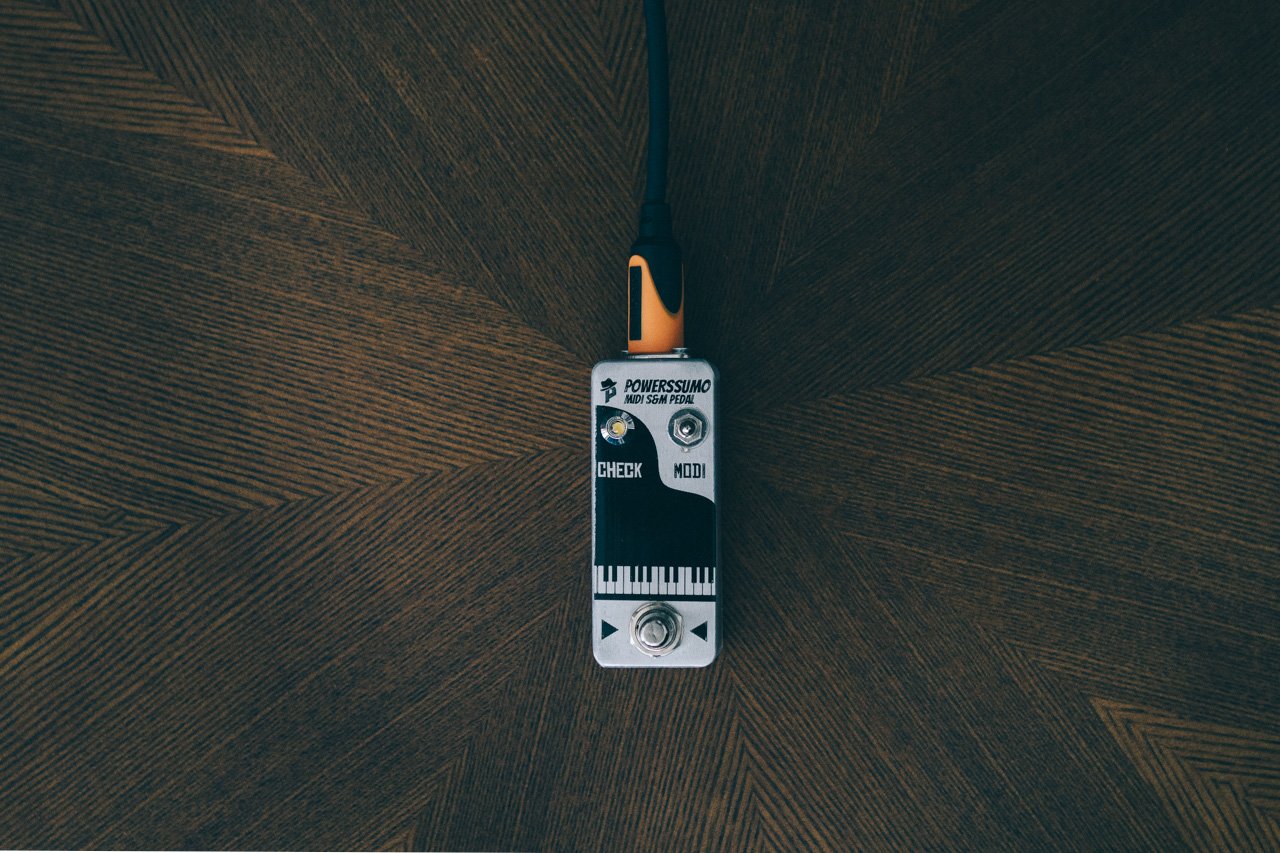
POWERSSUMO - MIDI Sustain & Modulation Pedal

This pedal is designed to work with any MIDI keyboards, that don't have a dedicated 6.3 jack.

If you're a keyboard player, you know how important sustain and modulation pedals can be to create the right sound and expression in your playing. However, not all MIDI keyboards come with a 6.3 jack to connect one. That's where the POWERSSUMO - MIDI Sustain & Modulation Pedal comes in.

POWERSSUMO - MIDI Sustain & Modulation Pedal

This pedal is designed to work with almost any keyboards. It connects to your keyboard through the MIDI port and provides sustain or modulation capabilities.

Introducing this versatile and dynamic MIDI sustain and modulation pedal - a game-changer for any keyboardist. Because this pedal provides two effects in one. When one of its modes is switched on and active, the built-in LED indicates this with a short flashing sequence of 5 times. With the switch in the "S" position, the pedal provides a realistic and precise sustain effect that allows you to control the length of your notes with ease. And with the switch in the "M" position, the pedal provides a dynamic modulation effect that adds depth and expression to your playing. With the built-in LED that turns on when the foot switch is pushed, you'll always know when the effect is engaged.

The original Hammond enclosure has the great typical ANDREW B. POWERS design and is made from high-quality diecast aluminum with a metallic finish. Therefore that can withstand the rigors of regular use. Rubber feet guarantee a stable and secure standing position. The design is very sleek and compact, making it easy to transport and use in a variety of settings. It’s the smallest pedal available on the market.

In summary, the POWERSSUMO - MIDI Sustain & Modulation Pedal is a must-have accessory for any keyboardist looking to add greater control, expression, and versatility to their playing.

POWERSSUMO - MIDI Sustain & Modulation Pedal

Specifications:
Output: MIDI-USB-B-Buchse, MIDI DIN (5V)
Power supply: 9V Battery
Current consumption: 8mA
Quiescent current: 2mA
Dimensions (case): 3.65in x 1.52in x 1.22in // 93mm x 39mm x 31mm
Weight: 5.75oz // 163g

Box content:
- The famous POWERSSUMO - MIDI Sustain & Modulation Pedal

Designed and handwired with ❤️ in the California and England.

Order yours today and experience the difference it can make in your audio setup!


If you have any questions, please drop me a message!

POWERSRECCAB - Design Record Cabinet by Andrew B. Powers

The POWERSRACK is beautiful uniquely handmade design cabinet for vinyl records, Hi-Fi equipment and books

Indulge your passion for music with the POWERSRECCAB. Handcrafted with meticulous attention to detail, this exceptional record cabinet offers a stylish and practical solution for storing your beloved vinyl collection.

The sturdiness of solid multiplex beech panels ensure that each of the four compartments has been ingeniously crafted to accommodate approximately 52-64 records (album, 33 rpm) along with their covers. This means that records with a total weight of up to 204 lbs. (92.4kg) can be loaded.

Except for the wood of the top, everything was stained was staining with a mid walnut color and coated with five layers of the finest shellac. So the surfaces look fantastic.

What truly sets this record cabinet apart is the table top, which have been artfully repurposed from reclaimed wood boards and beams. These reclaimed wood have lived lifetimes as part of industrial businesses, construction companies and old houses, including wood washed up on shores. After extensive cleaning and sanding, several coats of Danish Oil were applied to seal and finish the beautiful wood surface of the table top. As a result, a satin matte finish is created that is hard, durable and incredibly attractive. Please note: Table top plate which can be seen in these photos is made of wood from a burnt down house.

To protect the covers of the records when removing and loading into the cabinet, the bottoms of the compartments are lined with soft but durable felt.

Designed with both style and functionality in mind, the classic hairpin legs lend a modern flair to the cabinet, beautifully complementing any décor. The steel legs are sealed with a special rust preventing coat, few natural rust spots may appears, this gives a great and more aged industrial feel.

Included in the scope of delivery are rubber tips for the ends of the hairpin legs. The rubber tips help keep the furniture from shifting or gliding on bare floors while offering protection from scratches to the floor.

Record sideboards are designed with enough space to store Hi-Fi and power cables on the back. As a result, the POWERSRECCAB can be placed very close to any wall.

Whether it graces your living room, music corner, entertainment area, music studio or record store, this cabinet becomes the centerpiece that sparks conversations and leaves a lasting impression on your guests.

The POWERSRECCAB are 55.11in/140.0cm wide, 15.75”/40.0cm deep (depth of compartments 13.19in/33.5cm) and 29.5in/75.0cm high (length of the legs 14.17in/36.0cm). Available in color of walnut (“WEST HOLLYWOOD”). This studio rack is available in UK, USA, Canada, Europe and Australia.

Designed and manufactured with ❤️ in the California and England.

Order yours today and experience the difference it can make in your audio setup!


If you have any questions, please drop me a message!

BIG security risk - Photo passes on social media by Andrew B. Powers

Photo Passes from Concert  Photographer Andrew B. Powers

Social media has an undeniable impact on our world and of course that includes the music industry, including the niche of concert photographies. As photographers in this field, we deal with visual media that ranges from showcasing our work to providing insights into our lives.

For emerging music photographers and individuals involved in live events may be excited to receive credentials. Whether it's a coveted photo pass, a tour laminate, or a festival credential, the inclination to share images of these achievements on social media is entirely natural. However, here's why you shouldn't.

Security measure

Passes serve as a vital security measure, designed to guarantee that only authorized individuals gain access to restricted areas. These include not only sensitive locations such as backstage areas, dressing rooms, rest areas, technical areas, parking for nightliners and trucks or the catering, but the events as a whole as well.

The passes are primarily important for the organizers of the event and the security. Because they are a fundamental part of ensuring the safety of the event staff and visitors.

Forged passes

The critical reason for refraining from posting photos of photo passes, tour laminates, and other event credentials is the ongoing issue of people attempting to counterfeit these items in order to gain unauthorized access to events.

A noteworthy incident from 2021 involved a TikToker who garnered attention for fabricating a pass for a Kanye Donda event. On camera, he boasted about securing a better view of the show than even Kanye's own family. This individual had discovered a social media post displaying the passes. He built a rough facsimile and made his way through the security easily.

There are special forums on Reddit communities dedicated only to the art of pass forgery and admission tickets. Additionally, there is a group of wannabe influencers who engage in pass counterfeiting as a means to attend concerts and other events -only to get attention in the social media.

More complications

Nearly every photographer has encountered situations where they received one set of instructions from an authority figure of the event organizer only for security to have conflicting interpretations. Then, despite previously clearly communicated and established rules, misunderstandings can arise. Access restrictions, limited time quotas and more are then the result.

Counterfeiting passes adds an additional layer of complexity and challenge for everyone involved. Whenever there is a perceived security risk, security measures are intensified, leading to increased scrutiny of all individuals. Publicly sharing images of photo passes on social media compounds this problem by amplifying the need for heightened security measures.

Security

Credentials play a vital role in facilitating access to secure areas, and it's imperative that only authorized individuals occupy these spaces. I'd rather not get into the most extreme possible consequences of publishing credentials on the Internet.

I implore you, let's prioritize the safety. Let's ensure the well-being of our peers, the fans, and the artists.

Therefore, please refrain from sharing photos of your event credentials online. This includes not just your photo passes but also your tour laminates, festival badges and also your ID.

Timing

When is it appropriate to share photos of passes? The safest timing would be once the tour has concluded. Credentials are routinely changed from one tour year to the next, precisely to enhance safety. After one tour concludes, the subsequent tour featuring the same artist will introduce entirely new sets of credentials with distinct appearances.

If you still decide to post a pass online, I strongly advise waiting until the tour or festival has wrapped up.

How to

If you wish to share images from your work while using a photo pass, it's advisable not to show it. Ideally, remove it and stow it in your pocket or somewhere discreet. Always make sure that the pass isn't easily recognizable.

For BTS photos, you can get creative by adding GIFs, stickers, or emojis over the photo pass to mask it. Basically, any method of hiding the pass is better than showing.

Conclusion

  • Passes serve as a security measure

  • There are individuals actively attempting to counterfeit passes

  • Counterfeit passes pose a substantial security risk

  • Fake passes and unauthorized entry attempts create difficulties for everyone

  • Don't show your pass around swankily, when you're out in public

  • If you do decide to post passes, then never during an ongoing tour or event

  • Conceal passes within photos or cover them before posting


If you are new to music photography, welcome. Please share your photos - just not your photo passes!

Do you have any recommendations or personal guidelines that you find helpful?

Please feel free to comment and share your thoughts on “BIG security risk - Photo passes on social media”.


If you like my work or the free stuff and want to say thank you, please use this opportunity now and

 
Buy Me a Coffee at ko-fi.com
 

THANK YOU, very much! 🙏🏻


POWERSYAP - Headphone Amplifier by Andrew B. Powers

POWERSYAP - Headphone Amplifier (Backside) 

The POWERSYAP is the perfect solution for your audio problems.

The POWERSYAP is a pretty awesome headphone amp. Whether you're performing live, recording in the studio or want to practice your guitar playing without disturbing others or need a compact solution while traveling. This headphone amp is the perfect tool for any musician.

POWERSYAP - Headphone Amplifier (Mono Mode with In-Ear Headphones)

This headphone amp is versatile and can be used with a line-level mono output, like the monitor output from any mixing console, to power your headphones or in-ear monitors. It can also be used in the studio from a headphone output to give your artists volume control. Additionally, you can plug the headphone amp into those unused line outputs on the back of your interface to provide more headphone mixes for everyone in the studio.

If you own high-end headphones, this amplifier can also be a good investment to improve your listening experience. Because this kind of headphones have a High-impedance and require more power to drive to a reasonable volume. Using the POWERSYAP headphone amp with high-end headphones can result in improved sound quality, including better dynamics, clarity and detail in the audio.

POWERSYAP - Headphone Amplifier (Top View)

You can plug in either a stereo TRS or a mono TS quarter inch cable to the YAP amp, and you can easily toggle between a mono or stereo input with the M/OFF/S switch on the back side. The LED indicates the active mode and whether the input signal is being processed as a incoming mono or stereo signal. The headphone amp is built with high-quality and reliable jack connectors from Neutrik. The original Hammond enclosure has the great typical ANDREW B. POWERS design and is made from high-quality diecast aluminum with a powder-coated smooth green finish.

POWERSYAP - Headphone Amplifier (Back Side) 

The POWERSYAP is powered by an external 9-volt BOSS-style DC power supply, but it can also be powered by a 9-volt battery (battery clip included). This makes it perfect for situations where an external power supply is not available.

In summary, the POWERYAP headphone amplifier is a reliable and versatile device that will help you solve your audio problems and improve your guitar playing experience.

POWERSYAP - Headphone Amplifier (Stereo Mode) 

Specifications:
Input: 1/4" // 6.35mm TS/TRS (switchable mono/stereo) jack
Output: 1/4" // 6.35mm TRS stereo jack
Power supply: DC 9V
Quiescent current: 6mA
Recommended headphone impedance: 80-200Ohms
Dimensions (case): 4.43in x 2.38in x 1.22in // 113mm x 60mm x 31mm
Weight: 8.2oz // 233g

Box content:
- The famous POWERSYAP headphone amplifier
- 9-volt battery clip
- Adaptor for headphones (1/4 to 1/8 Inch)

Designed and handwired with ❤️ in the California and England.

Order yours today and experience the difference it can make in your audio setup!


If you have any questions, please drop me a message!

Roku SoundBridge – Saving a timeless network music player by Andrew B. Powers

Roku SoundBridge M1000 M1001

Still in use.

There are some devices that, even many years after their introduction, still make you wonder why nothing comparable is available anymore. For me, the Roku SoundBridge is definitely one of them!

I use the SoundBridge as a network music player connected to my stereo system. The device comes from a time when networked music was still something rather special, and streaming services as we know them today were still far from being part of everyday life. And yet, the basic concept behind the SoundBridge still feels surprisingly modern.

What I particularly like, especially compared with many modern streaming devices, is this clear separation of functions. The SoundBridge does not try to be a television, voice assistant, smart home hub, and cloud terminal all at once. It is a network music player. And that is precisely what makes it so interesting even today.

Ahead of its time.

With the SoundBridge, Roku had created a device that was remarkably well designed, both technically and conceptually, for its time. The first generation consisted of three models: the M500, M1000, and M2000. The three models were closely related technically and differed primarily in the type and size of their displays, as well as in their respective enclosure sizes.

The M500 did not have a graphics-capable VFD display and was therefore the simpler version. The M1000, by contrast, featured a large, graphics-capable VFD display that was remarkably impressive for a network music player of its era. The M2000 was larger still and correspondingly more expensive, but offered a display that remained easy to read even from a greater distance.

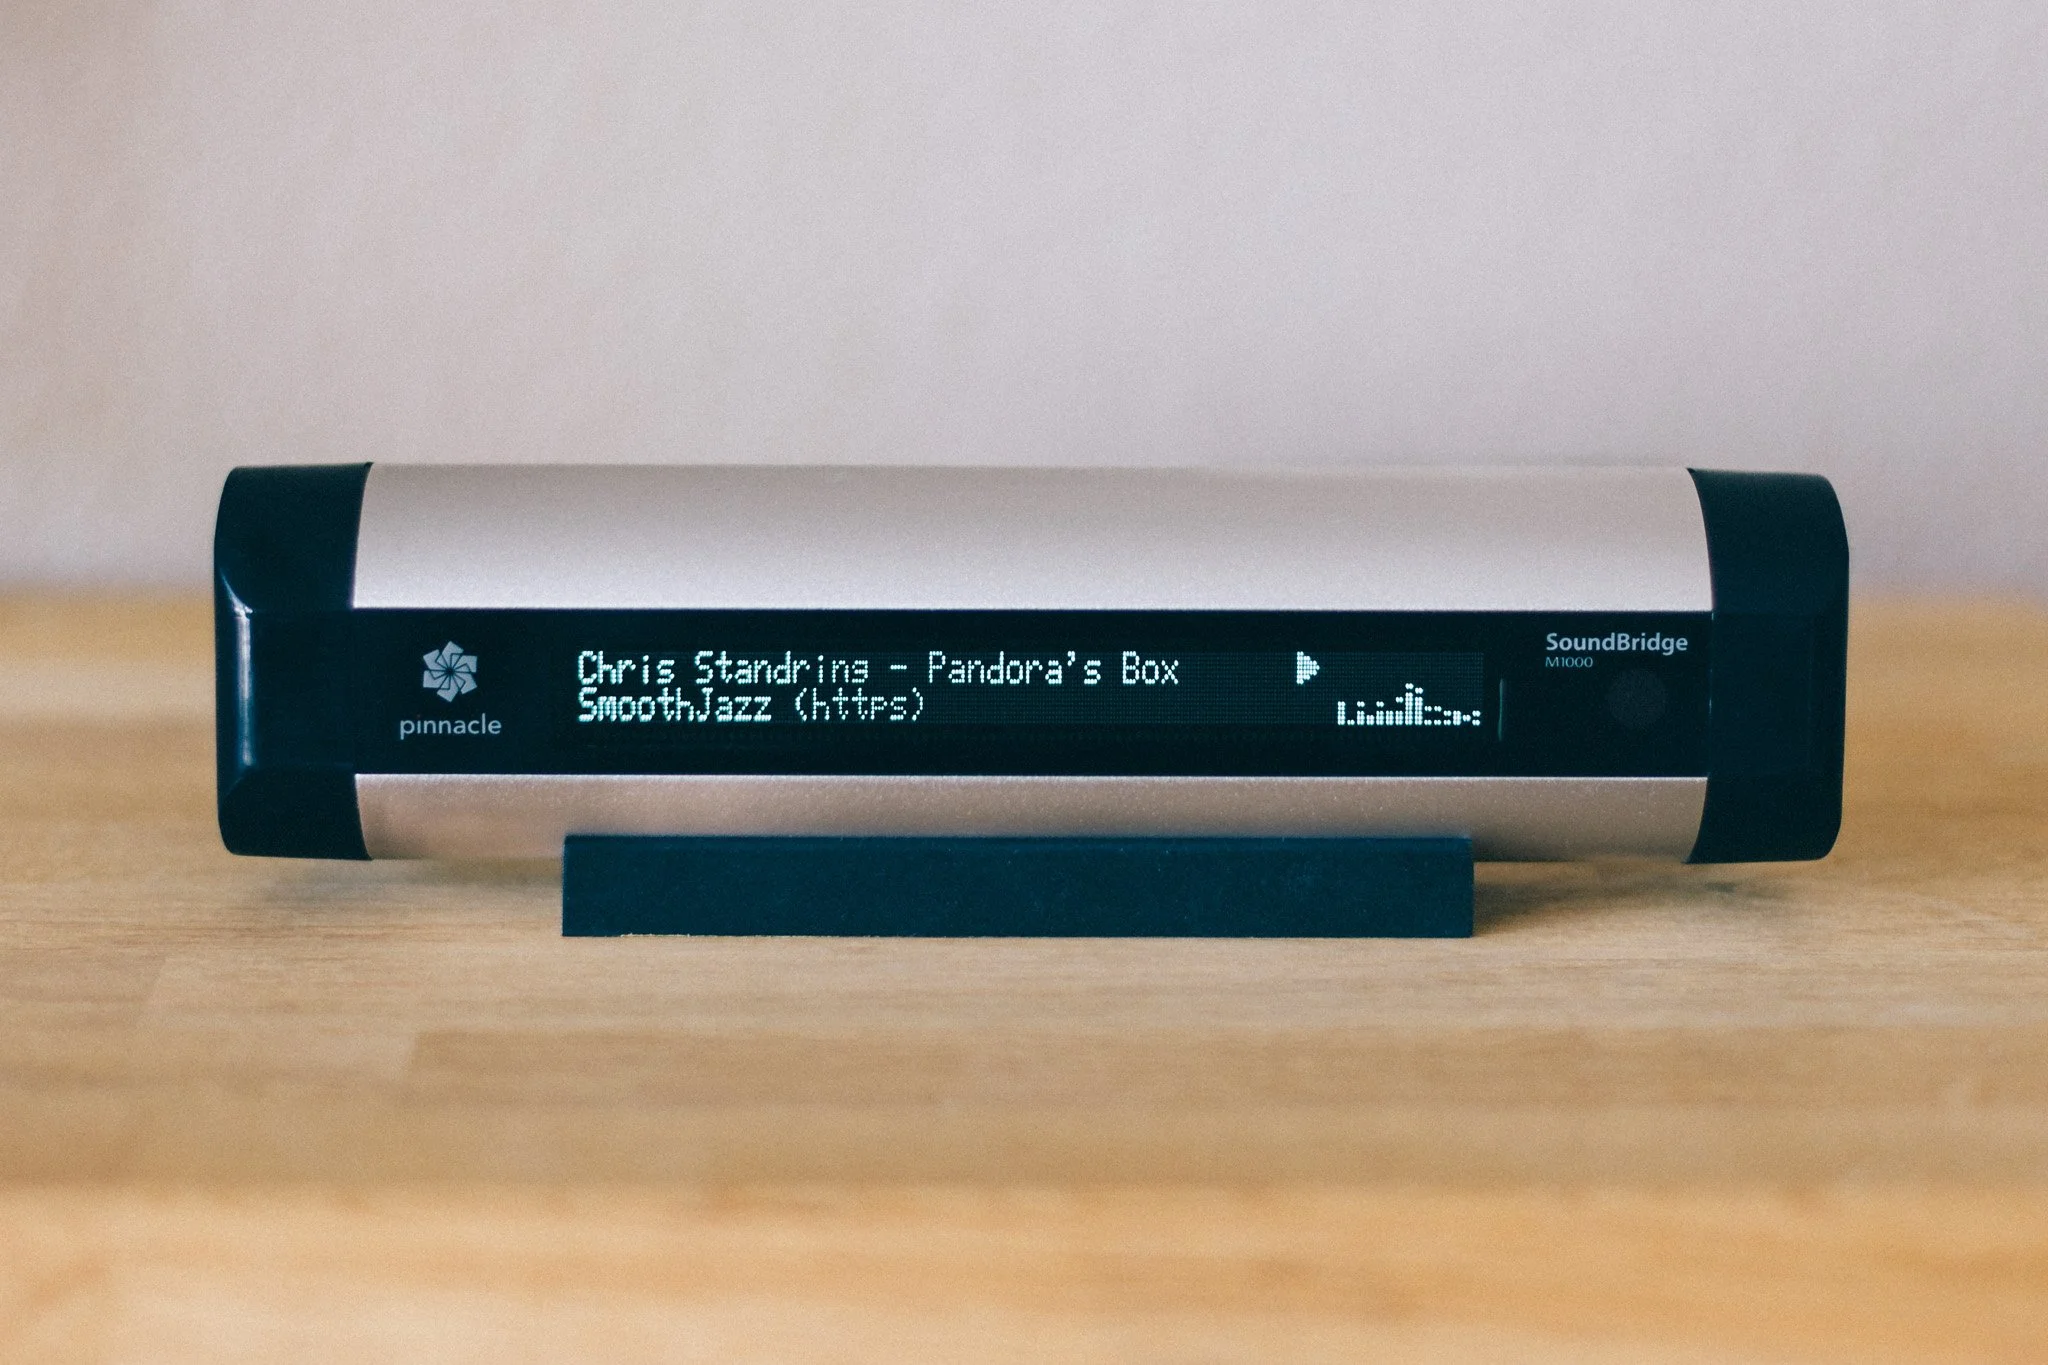
And that excellent display is, for me, still an essential part of the SoundBridge's character. While many modern streaming devices display information primarily through a smartphone app, the SoundBridge itself can show the currently playing track, the artist, or the selected source. It feels like a genuine standalone Hi-Fi component rather than a small network adapter whose actual user interface happens to live on a smartphone.

The first generation has, of course, long since become a piece of technology history. Even back then, the models were gradually replaced by the second generation. Today, M500, M1000, and M2000 units can generally only be found used, with the occasional old remaining stock turning up here and there.

The second generation included the M1001 as the successor to the M1000. Interestingly, Roku initially marketed the M1001 in some cases under the M1000 name as well, even though there are genuine differences between the two devices. They look very similar from the outside, but the M1001 has a somewhat different set of connections, with the connectors conveniently located on the rear panel.

The SoundBridge was also manufactured under license by Pinnacle for a time, particularly for markets outside North America. The Roku and Pinnacle units were essentially identical, although there was one important difference when it came to support for Apple's DAAP protocol: Pinnacle did not have a DAAP license from Apple. As a result, a Pinnacle SoundBridge could not directly access Apple iTunes shares or other DAAP servers. For iTunes users, however, Firefly provided a very good alternative server solution that was useful for more than just this particular purpose.

First & second generation - technically different.

The differences between the first and second generations were not limited to the enclosure, connectors, and features. The second-generation SoundBridge models, including the M1001, were based on a different audio architecture than the first-generation M500, M1000, and M2000.

The first generation in particular was appreciated by more demanding listeners for its audio quality. It also offered features such as HDCD support and DTS passthrough that were no longer available in the same form on the later models. Some owners therefore considered the audio quality of the second generation to be less impressive. At the same time, the new audio architecture was one of the reasons Roku was able to offer the devices at a significantly lower price. For most users, however, the sound quality remained more than adequate.

The second generation brought other advantages in return. It had a larger flash ROM, and Wi-Fi was built in. Firmware 2.7 also added WPA support, while the first generation was limited to WEP for wireless networking. The second generation was therefore not simply a technically inferior version of the original devices, but rather a further development with a different focus: lower cost, more modern networking capabilities, and a broader target audience.

Hardware - focused on the essentials.

Another thing I like about the SoundBridge is its remarkably straightforward and purposeful design. The device was not overloaded with as many features as possible, but instead focused on its actual purpose: receiving music over the network, processing it, and delivering it in good quality to a stereo system.

For music playback itself, the SoundBridge does not need a hard drive, an optical drive, or a fan. There are no mechanical components that have to be constantly moving during normal playback.

The SoundBridge connects to a music server or other source over a TCP/IP network. It processes the data and then outputs the music through its various audio connections. Depending on the model, this could be done via Ethernet or Wi-Fi. On the classic M-series models, the connection to the stereo system could then be made either via analog RCA or digitally through an optical or coaxial output, making the SoundBridge particularly interesting for a high-quality Hi-Fi setup. The analog output was also quite good. Personally, I have always found the overall sound quality excellent, and in comparison with older CD players connected via analog outputs, the SoundBridge actually sounded better to my ears.

Of course, this straightforward design does not mean that a device more than twenty years old is automatically free from age-related issues. Electronic components age, power supplies can eventually develop problems, and even a VFD display will not remain as bright and contrast-rich as it was on the first day. The underlying concept, however, is remarkably durable. The SoundBridge was not built around a short-lived online platform, but as a standalone network music player.

That technical simplicity is also part of its appeal for me. Essentially, it needs power, a network connection, and a connection to the audio system. For a device whose sole purpose is to play music, that is actually a remarkably well-defined job description.

soundbridge m1001 audio cabinet beastie boy books vintage receiver mid century house powerssowi soundbridge wizard

SoundBridge & Internet Radio

With later firmware versions, the SoundBridge also became particularly interesting as an Internet radio player. Starting with firmware 3.0, Roku integrated an online database containing a large number of radio stations, allowing users to search for stations and select them directly on the device. At the time, this was an exceptionally convenient solution.

There was no need to search for a stream on a computer, copy its address, and then somehow transfer it to the stereo system. The SoundBridge could search for radio stations itself and play the selected station directly.

The station database, however, was also a service external to the hardware itself. If the RadioRoku server was unavailable, new radio stations could not be selected through the database. Stations that had already been saved remained available, however. The SoundBridge provides 18 presets, allowing radio stations to be stored directly on the device and recalled even when the online database was unavailable.

At the time, this was an extremely practical solution. It also illustrates a problem that only became apparent years later with many devices from this generation: hardware can remain functional for far longer than the services it was originally designed to depend on.

Limitations in today's world.

Of course, by today's standards the SoundBridge is no longer a modern streaming device. It does not support the wide range of current streaming services that people expect from today's products, and its firmware has not received any major development for many years.

Modern HTTPS streams - big problem!

When the SoundBridge was developed, the technical requirements for Internet streaming were considerably simpler. HTTP-based audio streams were widespread, and communication between client and server was correspondingly straightforward.

Today, the situation is different. HTTPS has long since become the standard, and modern streaming servers use TLS encryption, current certificates, and protocols that network software from that era does not necessarily support.

For a modern computer, this is usually not a problem. Browsers and operating systems take care of certificates, encryption, and the latest protocol versions. Smartphones and modern streaming devices are also regularly updated and can therefore adapt to changes on the server side.

A SoundBridge naturally does not have the same ability to adapt. Its firmware comes from a different technological era and has not been updated for a long time to reflect the continued evolution of the Internet. The SoundBridge supports a surprisingly broad range of networking technologies for a device of its age, including WEP, WPA, AutoIP, DHCP, TCP, Telnet, HTTP and DRM. What it does not support, however, is HTTPS.

That missing HTTPS support is particularly significant today. The SoundBridge can communicate perfectly well over a TCP/IP network and can establish HTTP connections to streaming servers, but it cannot itself establish the modern TLS-encrypted HTTPS connections that have become standard on the Internet.

The last firmware updates were essentially limited to smaller fixes and adjustments, for example when changes were made to other services or protocols. There was therefore no later firmware development that could bring the SoundBridge's networking capabilities in line with the modern HTTPS-based Internet.

As a result, a stream can work perfectly well on a modern computer and still fail to play directly on the SoundBridge. The SoundBridge itself is not necessarily the problem. It can still reproduce audio extremely well, and it can still establish network connections. The difficulty arises where the capabilities of an older client meet the requirements of a modern streaming server.

At some point, that left me with an obvious question: Could this problem be solved without modifying the SoundBridge itself?

The solution - a proxy server.

The answer was surprisingly simple: the SoundBridge does not have to establish the modern HTTPS connection itself.

If a small server on the local network handles the connection to the Internet radio station, that server can take care of the technical requirements of the modern streaming server. It can then provide the SoundBridge with a stream that it can process using its existing capabilities.

This does not modernize the SoundBridge itself. Instead, it simply adapts the connection between the old hardware and the modern Internet.

For this purpose, NGINX was a natural choice. NGINX is a powerful web server and reverse proxy that is well suited to establishing a connection to a remote server and forwarding the resulting data stream to another client.

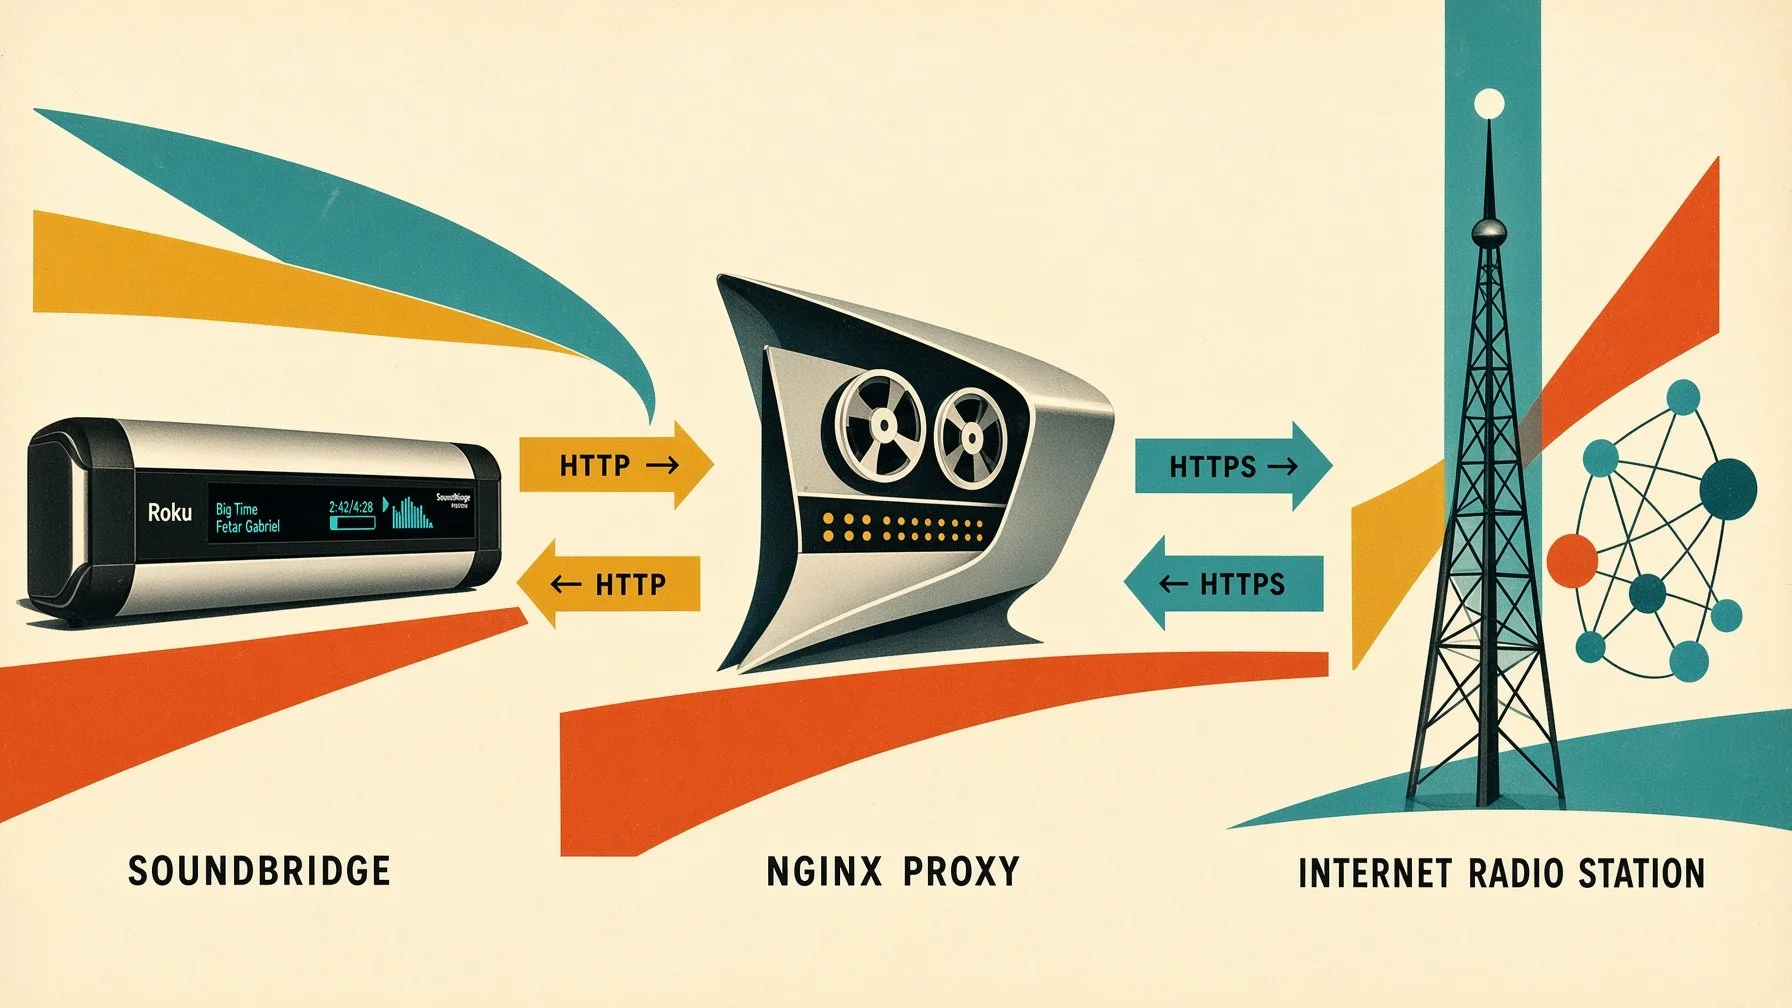
The basic setup is quite simple. The SoundBridge connects to a local HTTP address. NGINX accepts that connection and establishes an HTTPS connection to the actual radio station in the background. The incoming audio stream is then forwarded to the SoundBridge without unnecessary buffering.

In this way, the SoundBridge can continue to work with its existing network protocols, while NGINX handles the modern HTTPS connection to the radio station in the background.

First working solution.

Once the basic idea for the proxy had been established, the next step was to turn it into a working solution. I therefore decided not to install NGINX directly on the host system, but to run it inside a Docker container. NGINX does not require a complex environment and can be operated completely separately from the actual system installation. The required configuration, ports, and runtime environment of the proxy are therefore contained within a clearly isolated container. If the configuration needs to be changed later, or the proxy needs to be rebuilt completely, the underlying system remains largely unaffected.

Another advantage is easy reproducibility. The NGINX configuration can be managed independently of the underlying operating system. The container can be stopped, restarted, or recreated whenever necessary, without having to manually reinstall and configure NGINX on the host each time.

For managing the container, I used Portainer. Its graphical interface is extremely convenient, although Portainer is by no means required - Docker can of course be managed entirely from the command line. For a small home server, however, having a graphical interface makes administration considerably more convenient.

The actual NGINX configuration for this first solution consisted of two files. The first file defined the basic NGINX environment and specified, among other things, where logs were stored, which network parameters were used, and that additional server configurations should be loaded from:

/etc/nginx/conf.d/

The second file then defined the actual HTTP server. NGINX listened on port 80 and therefore provided a standard HTTP endpoint for the SoundBridge within the local network. The crucial part of the configuration was the address structure:

/soundbridge/URL

This allowed the SoundBridge, for example, to access a local address such as:

http://192.168.1.1:8777/soundbridge/...

NGINX received this request and used the part of the address following /soundbridge/ as the destination for its connection to the actual radio station.

The crucial difference compared with the SoundBridge itself was that NGINX could establish the connection to the destination server using HTTPS. The configuration therefore explicitly instructed NGINX to use HTTPS when connecting to the remote server. SNI was also enabled, and TLS 1.2 and TLS 1.3 were allowed for the connection to the remote server.

This created a clear separation between the two sides of the proxy. On one side, the old SoundBridge communicated with the local NGINX server using its existing network protocols. On the other side, NGINX established the modern HTTPS connection to the actual streaming server.

mid century space age palm springs shag soundbridge http https proxy server powerssowi soundbridge wizard

That separation was the key element of the entire solution. The SoundBridge therefore did not need to understand TLS or deal with the certificates used by the modern streaming server. From its perspective, the proxy was simply another network server on the local network. The modern encryption and all the associated requirements were handled entirely on the other side of the proxy.

Optimized for Streaming.

A normal web server does not necessarily have to be configured for maintaining a connection as a continuous data stream for hours at a time. For an Internet radio stream, however, that is exactly what is required. The server is not downloading a completed file. Instead, it continuously receives new audio data and immediately passes that data on to the client.

The NGINX configuration was therefore adjusted specifically for this purpose. Proxy buffering was disabled, as was caching. NGINX was not supposed to store the audio stream temporarily and then forward it in larger blocks. Instead, the incoming data should be passed to the SoundBridge as directly as possible.

The timeouts were also configured with longer intervals. A radio station does not terminate a connection simply because a complete file has not been transferred within a few seconds. The stream remains open and continuously delivers new audio data.

Various HTTP headers were also configured to improve compatibility with different streaming servers. These included a custom User-Agent and the forwarding of the Host header. NGINX was intended to identify itself clearly as an independent client to the radio station, while the SoundBridge continued to see a simple HTTP connection on the local side.

The configuration also included a simple health check. A separate local path could be used to verify whether the NGINX server itself was reachable. Although this was not necessary for audio playback, it made troubleshooting a running container considerably easier.

soundbridge m1001 vintage receiver mid century house powerssowi soundbridge wizar

Conclusion.

The result was a surprisingly simple solution to a problem that initially appeared to make the SoundBridge obsolete. Instead of replacing the player with a modern streaming device, I was able to keep the original hardware in use and adapt it to the technical requirements of today's Internet radio.

What makes the solution particularly appealing to me is that the SoundBridge itself remains completely untouched. Its original firmware, hardware, display, controls, and audio architecture can continue to be used exactly as they were designed.

In other words, rather than replacing a perfectly good piece of hardware simply because the Internet around it has changed, the solution adapts the connection between the old device and the modern Internet.

And that is ultimately what makes the SoundBridge worth saving.

Check out this new great solution for your SoundBridge too


If you have any questions, please drop me a message!