Roku SoundBridge – Making the SoundBridge Wizard smarter by Andrew B. Powers

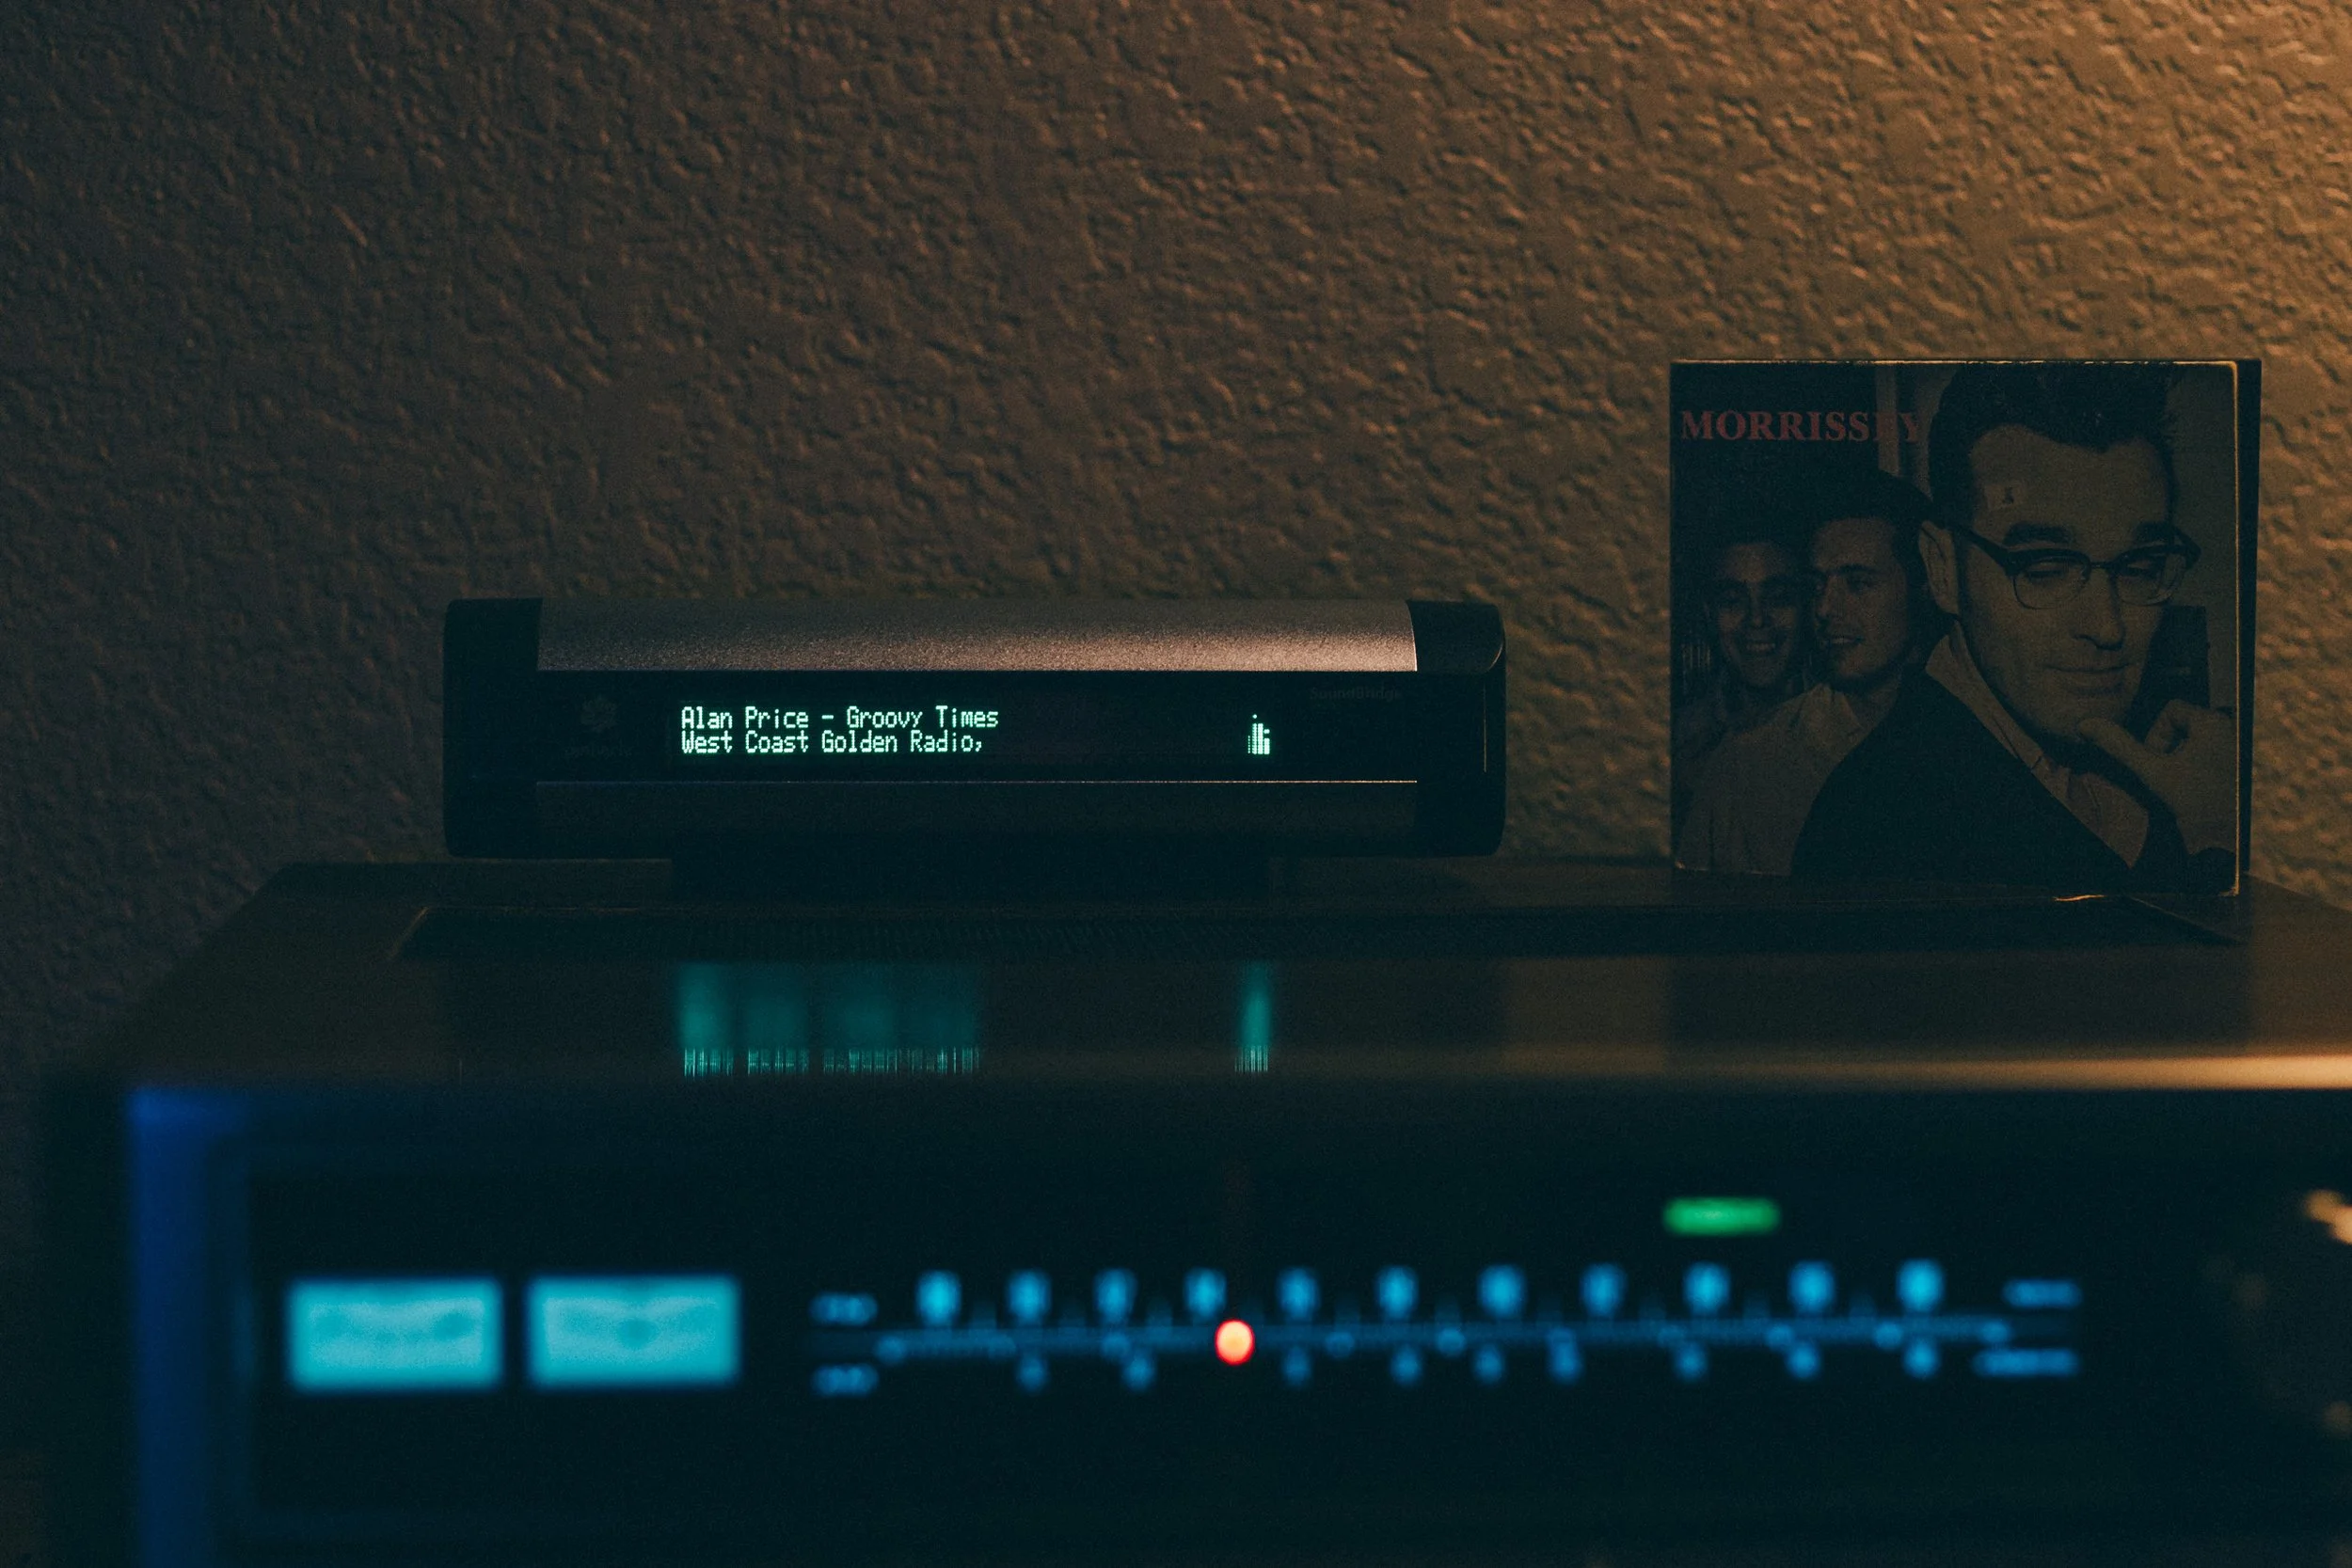
roku pinnacle soundbridge m1001_pioneer sx636 receiver powerssowi soundbridge wizard

Why stream intelligence was needed.

The first NGINX solution had one decisive advantage: it was simple. The SoundBridge received a local HTTP endpoint, while NGINX handled the HTTPS connection to the actual stream in the background. For many streams, this approach worked extremely well.

Over time, however, it became clear that a pure HTTPS-to-HTTP proxy had its limitations. An audio stream is not just audio data. Internet radio streams often carry additional information such as station name, genre, bitrate, and the currently playing track through ICY metadata. Streaming servers also do not all behave the same way: some URLs are simply redirects, some only deliver the actual stream after several HTTP steps, while others use different headers or stream formats.

This is where the second version of the POWERSSBWIZ - SOUNDBRIDGE WIZARD ESSENTIAL came in. Instead of simply passing the connection between the SoundBridge and the radio station through, the SOUNDBRIDGE WIZARD could analyze the stream itself and, when necessary, prepare it specifically for the SoundBridge.

From a simple proxy to a stream-aware relay.

The new version was therefore no longer implemented purely as an NGINX configuration, but as its own small streaming service. The application runs in a Docker container and is based on Python 3.12. In addition, FFmpeg and the required CA certificates are installed inside the container.

This allows the POWERSSBWIZ - SOUNDBRIDGE WIZARD ESSENTIAL to use different approaches depending on the source.

First, the requested stream URL is analyzed and the SOUNDBRIDGE WIZARD attempts to open the stream directly as an ICY stream.

That is an important difference from the original NGINX solution.

ICY metadata.

A traditional Internet radio stream can transmit additional ICY information alongside the actual audio data. The POWERSSBWIZ - SOUNDBRIDGE WIZARD ESSENTIAL explicitly requests this information using the header

Icy-MetaData: 1

During the connection, it can process information such as the station name, genre, bitrate, and the interval at which metadata is transmitted.

The most important piece of information, however, is the actual track title.

ICY metadata can contain a value such as StreamTitle. The SOUNDBRIDGE WIZARD ESSENTIAL can extract this metadata from the live stream and use it to determine the currently playing track. The corresponding function parses the ICY metadata and extracts the individual keys and values.

The SOUNDBRIDGE WIZARD can then package the detected title back into ICY metadata. It creates a corresponding StreamTitle field and sends it to the client as ICY metadata.

The result is more than just a working audio stream: the relevant radio metadata can remain available to the SoundBridge as well.

Keeping the SoundBridge informed.

The POWERSSBWIZ - SOUNDBRIDGE WIZARD ESSENTIAL provides several built-in endpoints that make the current streaming state available without requiring direct access to the container.

The main web interface is available at:

http://<PUBLIC_HOST>:8731/

With the configuration used for this project, for example:

http://192.168.1.1:8731/

The detailed user interface itself is described later in the Web Interface section. For stream monitoring and diagnostics, the SOUNDBRIDGE WIZARD also provides dedicated status endpoints.

The JSON status API is available at:

/api/status

For example:

http://192.168.1.1:8731/api/status

Depending on the current playback state, the API provides information such as:

  • status

  • mode

  • source

  • resolved_source

  • station

  • genre

  • bitrate

  • now_playing

This makes it possible to inspect the current stream state programmatically or directly from a browser.

For a basic service check, the SOUNDBRIDGE WIZARD ESSENTIAL also provides a health endpoint:

/health

For example:

http://192.168.1.1:8731/health

The health endpoint provides a simple indication that the service is running and also reports basic information about the current SOUNDBRIDGE WIZARD installation.

These endpoints are also reported by the SOUNDBRIDGE WIZARD ESSENTIAL when the service starts.

No ICY - no problem!

Of course, not every stream provides the expected ICY metadata structure. The POWERSSBWIZ - SOUNDBRIDGE WIZARD ESSENTIAL therefore does not rely exclusively on ICY.

When the source stream cannot be processed directly this way, FFmpeg provides an alternative processing path.

FFmpeg opens the source stream and converts the audio into a standardized MP3 stream for the SoundBridge.

The SOUNDBRIDGE WIZARD also uses automatic reconnect options. If the connection to the source server drops or reaches the end of the stream, FFmpeg can attempt to reconnect. Among other options, the SOUNDBRIDGE WIZARD uses -reconnect, -reconnect_streamed, -reconnect_at_eof, and a maximum reconnect delay.

This makes the second solution considerably more flexible than a pure HTTP/HTTPS proxy. The source no longer has to provide audio in exactly the format the SoundBridge can handle directly. The POWERSSBWIZ - SOUNDBRIDGE WIZARD ESSENTIAL can process the stream through FFmpeg first and then output it in a format suitable for the SoundBridge.

A common output for the SoundBridge.

In FFmpeg mode, the audio is output as MP3 at 128 kbps, 44.1 kHz, stereo.

This effectively shields the SoundBridge from many of the details and inconsistencies of modern streaming servers.

For the SoundBridge, the connection remains simple:

SoundBridge → HTTP → SoundBridge Wizard → Internet stream

Behind the scenes, however, the POWERSSBWIZ - SOUNDBRIDGE WIZARD ESSENTIAL can work considerably harder:

SoundBridge → HTTP → SoundBridge Wizard → HTTPS / ICY / FFmpeg → Internet Radio

That additional processing capability is what sets the new solution apart from the original version.

The stream endpoint.

The actual stream is provided through a dedicated HTTP endpoint:

/powerssbwiz/<stream-url>

This endpoint is also displayed when the POWERSSBWIZ - SOUNDBRIDGE WIZARD ESSENTIAL starts.

The SOUNDBRIDGE WIZARD accepts both http:// and https:// source URLs. The supplied URL is extracted from the request and then processed by the SOUNDBRIDGE WIZARD ESSENTIAL.

This allows the SoundBridge to connect to a simple local HTTP stream while the SOUNDBRIDGE WIZARD handles the connection to the actual Internet stream in the background and, depending on the source and processing path, prepares the audio accordingly.

The SOUNDBRIDGE WIZARD ESSENTIAL therefore acts as an intermediary between legacy streaming hardware and today's streaming servers.

Docker container.

The technical implementation is fully containerized and designed for a straightforward private installation.

The application runs as a small Docker stack consisting of two containers.
The SOUNDBRIDGE WIZARD ESSENTIAL itself:

  • powerssbwiz_soundbridge_wizard_essential

The local PostgreSQL database

  • powerssbwiz_soundbridge_wizard_essential_postgres

The SOUNDBRIDGE WIZARD ESSENTIAL image is based on python:3.12-slim. FFmpeg, CA certificates, and the required Python dependencies are installed inside the container. The host system therefore does not need a separate Python environment, FFmpeg installation, or PostgreSQL setup.

Configuration is handled through a .env file. It defines the main parameters for the installation and network environment, including:

CONTAINER_NAME – the Docker container name
POSTGRES_CONTAINER_NAME – the PostgreSQL container name
HTTP_PORT – the HTTP port used by the SOUNDBRIDGE WIZARD ESSENTIAL
TZ – the time zone
PUBLIC_HOST – the host's IP address or hostname
DNS_PRIMARY – the primary DNS server
DNS_SECONDARY – the secondary DNS server
LOCAL_DB_DATA_PATH – the persistent PostgreSQL data directory
BACKUP_HOST_PATH – the directory used for local backups
BACKUP_INTERVAL_HOURS – the automatic backup interval
BACKUP_MAX_VERSIONS – the maximum number of stored automatic backups
ACTIVITY_LOG_RETENTION_DAYS – the default number of days System Log entries are retained

In the SOUNDBRIDGE WIZARD ESSENTIAL edition, the default HTTP port is 8731. The SOUNDBRIDGE WIZARD also listens internally on port 8731, so the Docker port mapping is deliberately kept simple: 8731 → 8731

With the default configuration, the web interface and SoundBridge relay are therefore available on port 8731 of the Docker host.

The PostgreSQL container stores the persistent application data independently from the SOUNDBRIDGE WIZARD ESSENTIAL container. Database files can be placed in a dedicated host directory, while backups can be written to a separate backup directory.

For example, a typical installation can use

/home/powerssbwizessential/database/postgres

for PostgreSQL data and

/home/powerssbwizessential/backup

for backups.

Backup management is integrated directly into the SOUNDBRIDGE WIZARD's web interface. Automatic backups can be enabled or disabled by setting an interval, the number of retained backup versions can be configured, and backups can also be created manually.

The interface shows the configured backup location, whether automatic backups are enabled, how many backups are currently stored, the time of the last successful backup, the next scheduled backup, and any backup error reported by the system.

Existing backups can be downloaded, verified, restored, or deleted directly from the web interface. A backup ZIP file can also be restored manually from the local computer.

The local PostgreSQL database is also used for the persistent System Log. Log entries therefore survive container restarts and remain independent of the application container itself. The default retention period can be defined through the .env file and later changed directly from the web interface.

The System Log and its retention setting are included in the normal POWERSSBWIZ backup data. Restoring a backup therefore also restores the corresponding log entries and log-retention configuration.

This containerized architecture keeps the SOUNDBRIDGE WIZARD ESSENTIAL largely independent of the underlying host operating system. Python, FFmpeg, the application itself, and PostgreSQL all run inside Docker, while persistent configuration, database files, backups, and log data remain clearly separated from the application container.

For administration, you can use Portainer, although it is not required. The complete installation can also be managed entirely from the command line with Docker and Docker Compose.

On a home server, Portainer is particularly convenient because both containers can be started, stopped, recreated, inspected, and monitored through a graphical interface. At the same time, the actual installation remains reproducible because the configuration is defined through docker-compose.yml and the .env file rather than being tied to Portainer itself.

Web Interface.

The web interface of SOUNDBRIDGE WIZARD ESSENTIAL is intentionally kept simple and focused on the functions needed for a private SoundBridge installation.
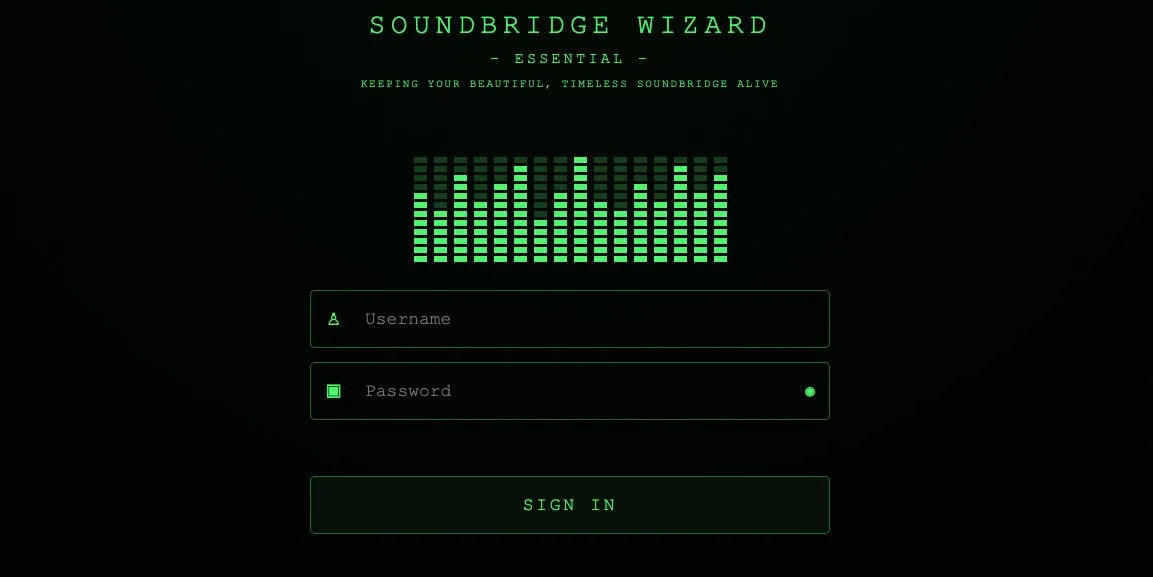
POWERSSBWIZ - SOUNDBRIDGE WIZARD ESSENTIAL - Login

After signing in, the main areas of the SOUNDBRIDGE WIZARD are available through a compact navigation menu.

DASHBOARD

The Dashboard provides an immediate overview of the current system state. It shows the SoundBridges that are currently active and receiving a stream through the SOUNDBRIDGE WIZARD.

Under ACTIVE SOUNDBRIDGES, each active device can be inspected in more detail. Clicking a device expands its current stream information, including the MAC address, playback detection method, operating mode, input and output format, ICY metadata status, station name, and the currently playing title.
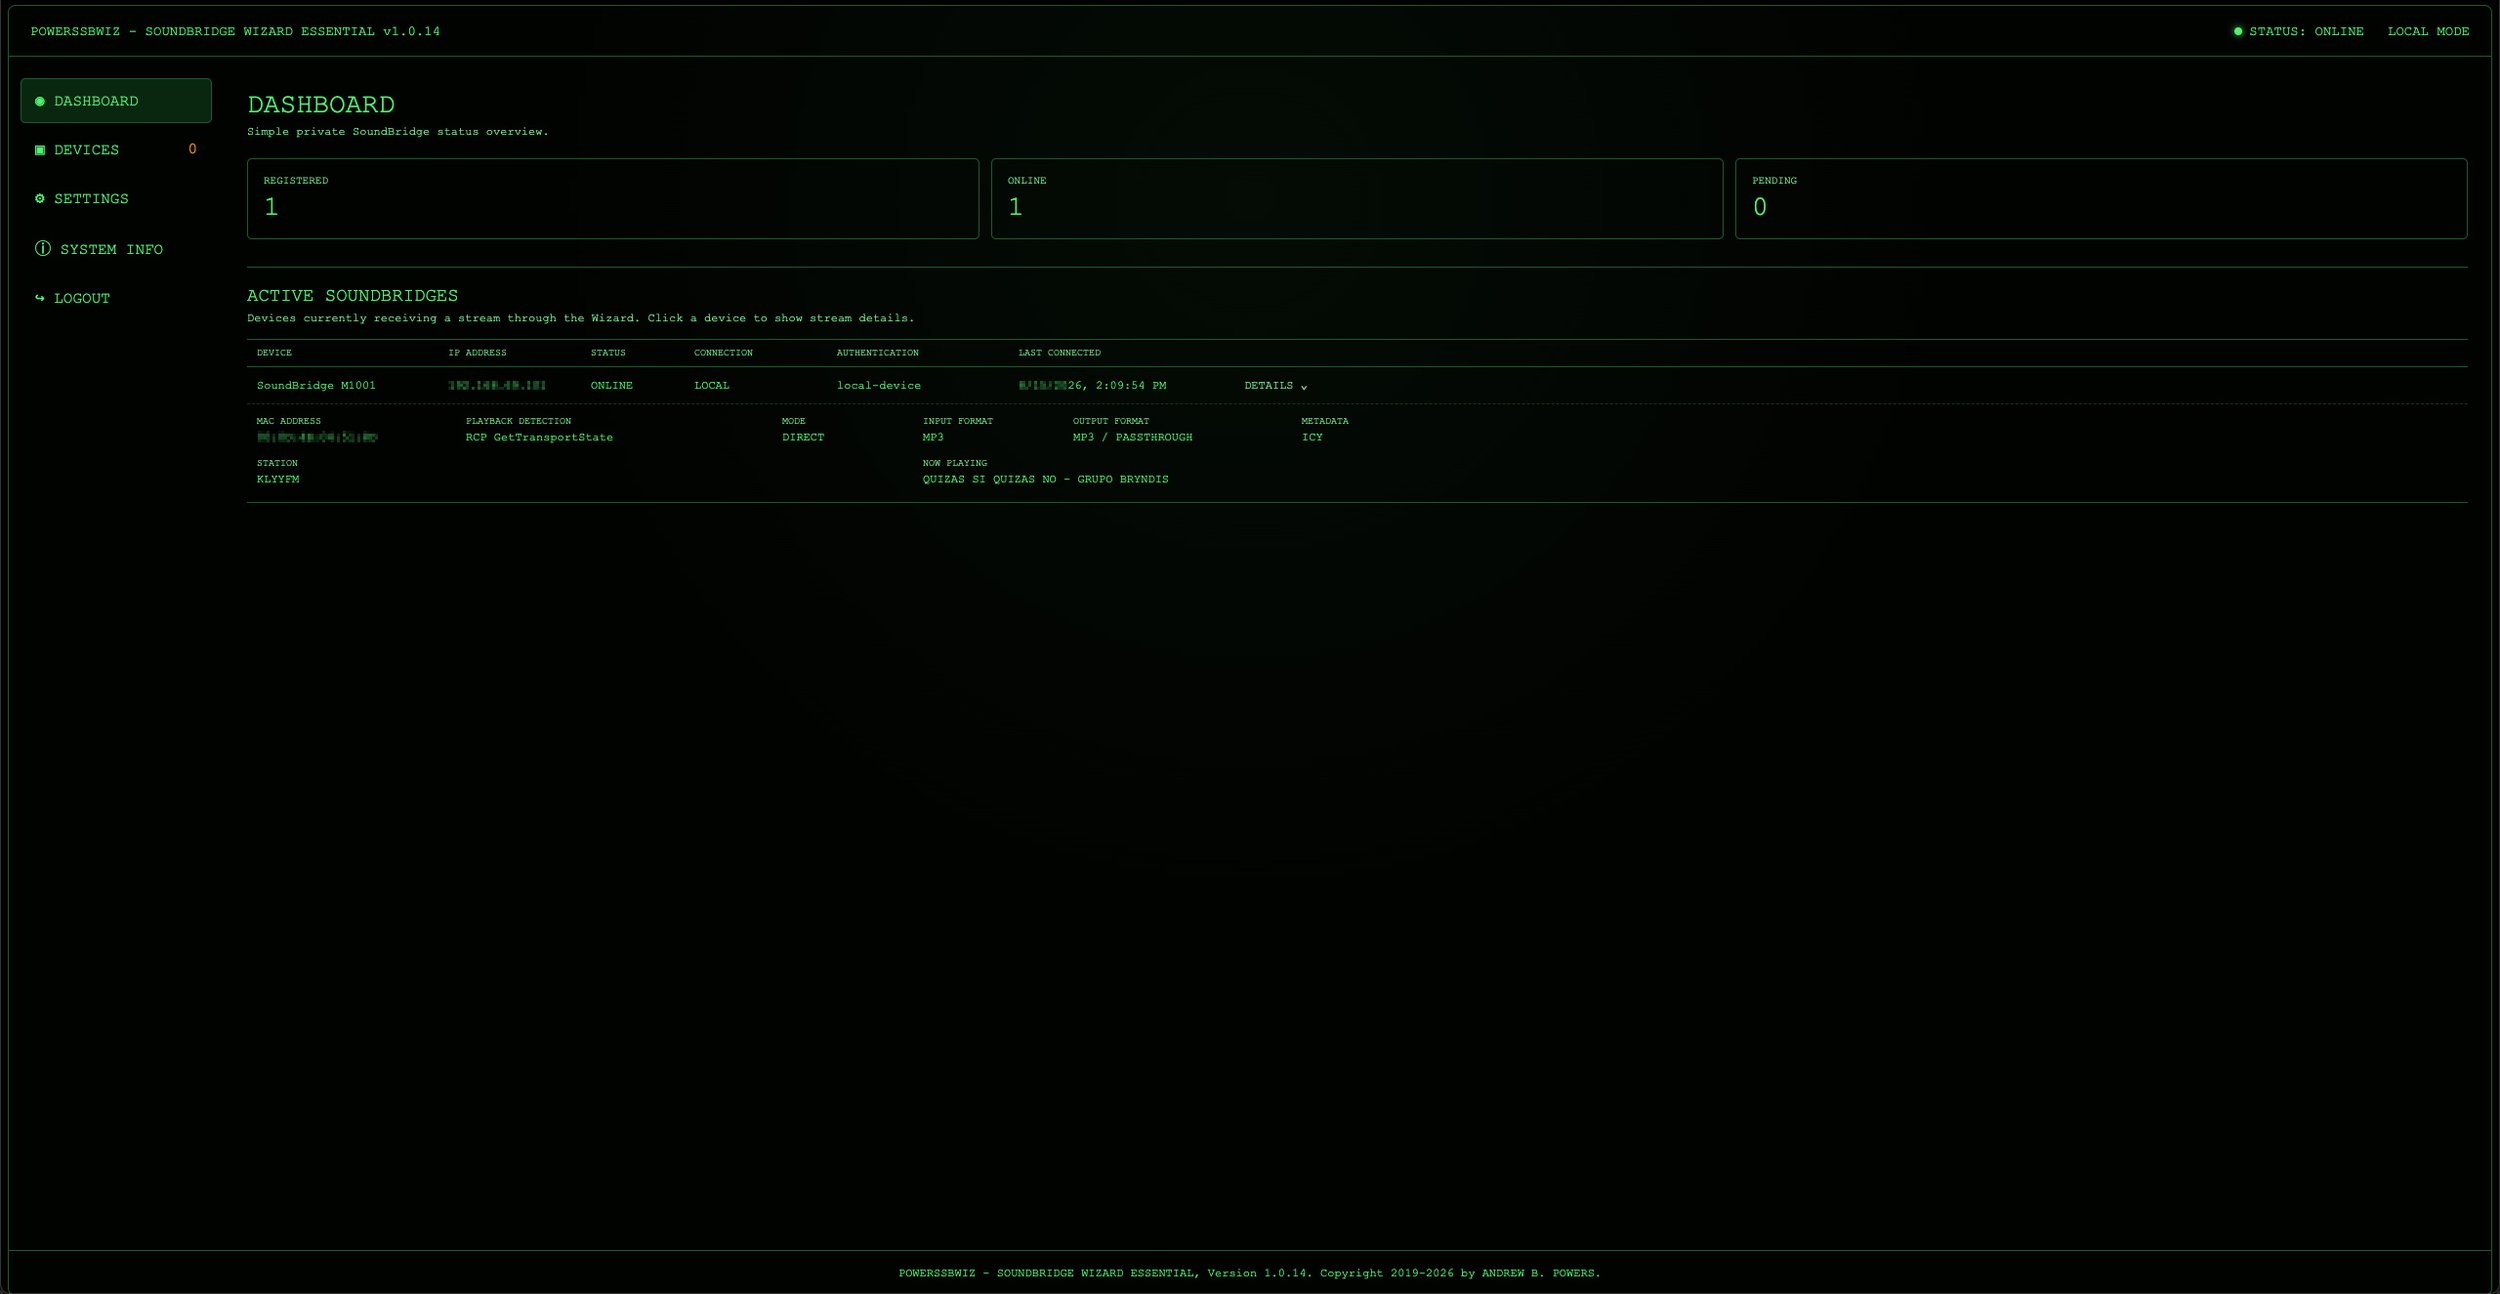
POWERSSBWIZ - SOUNDBRIDGE WIZARD ESSENTIAL - Dashboard

DEVICES

This section is used to manage SoundBridges known to the SOUNDBRIDGE WIZARD. It includes the REGISTERED DEVICES list, where authorized SoundBridges can be viewed and managed. Device names can be changed directly from this section, making it easier to identify individual players when several SoundBridges are used in the same network.
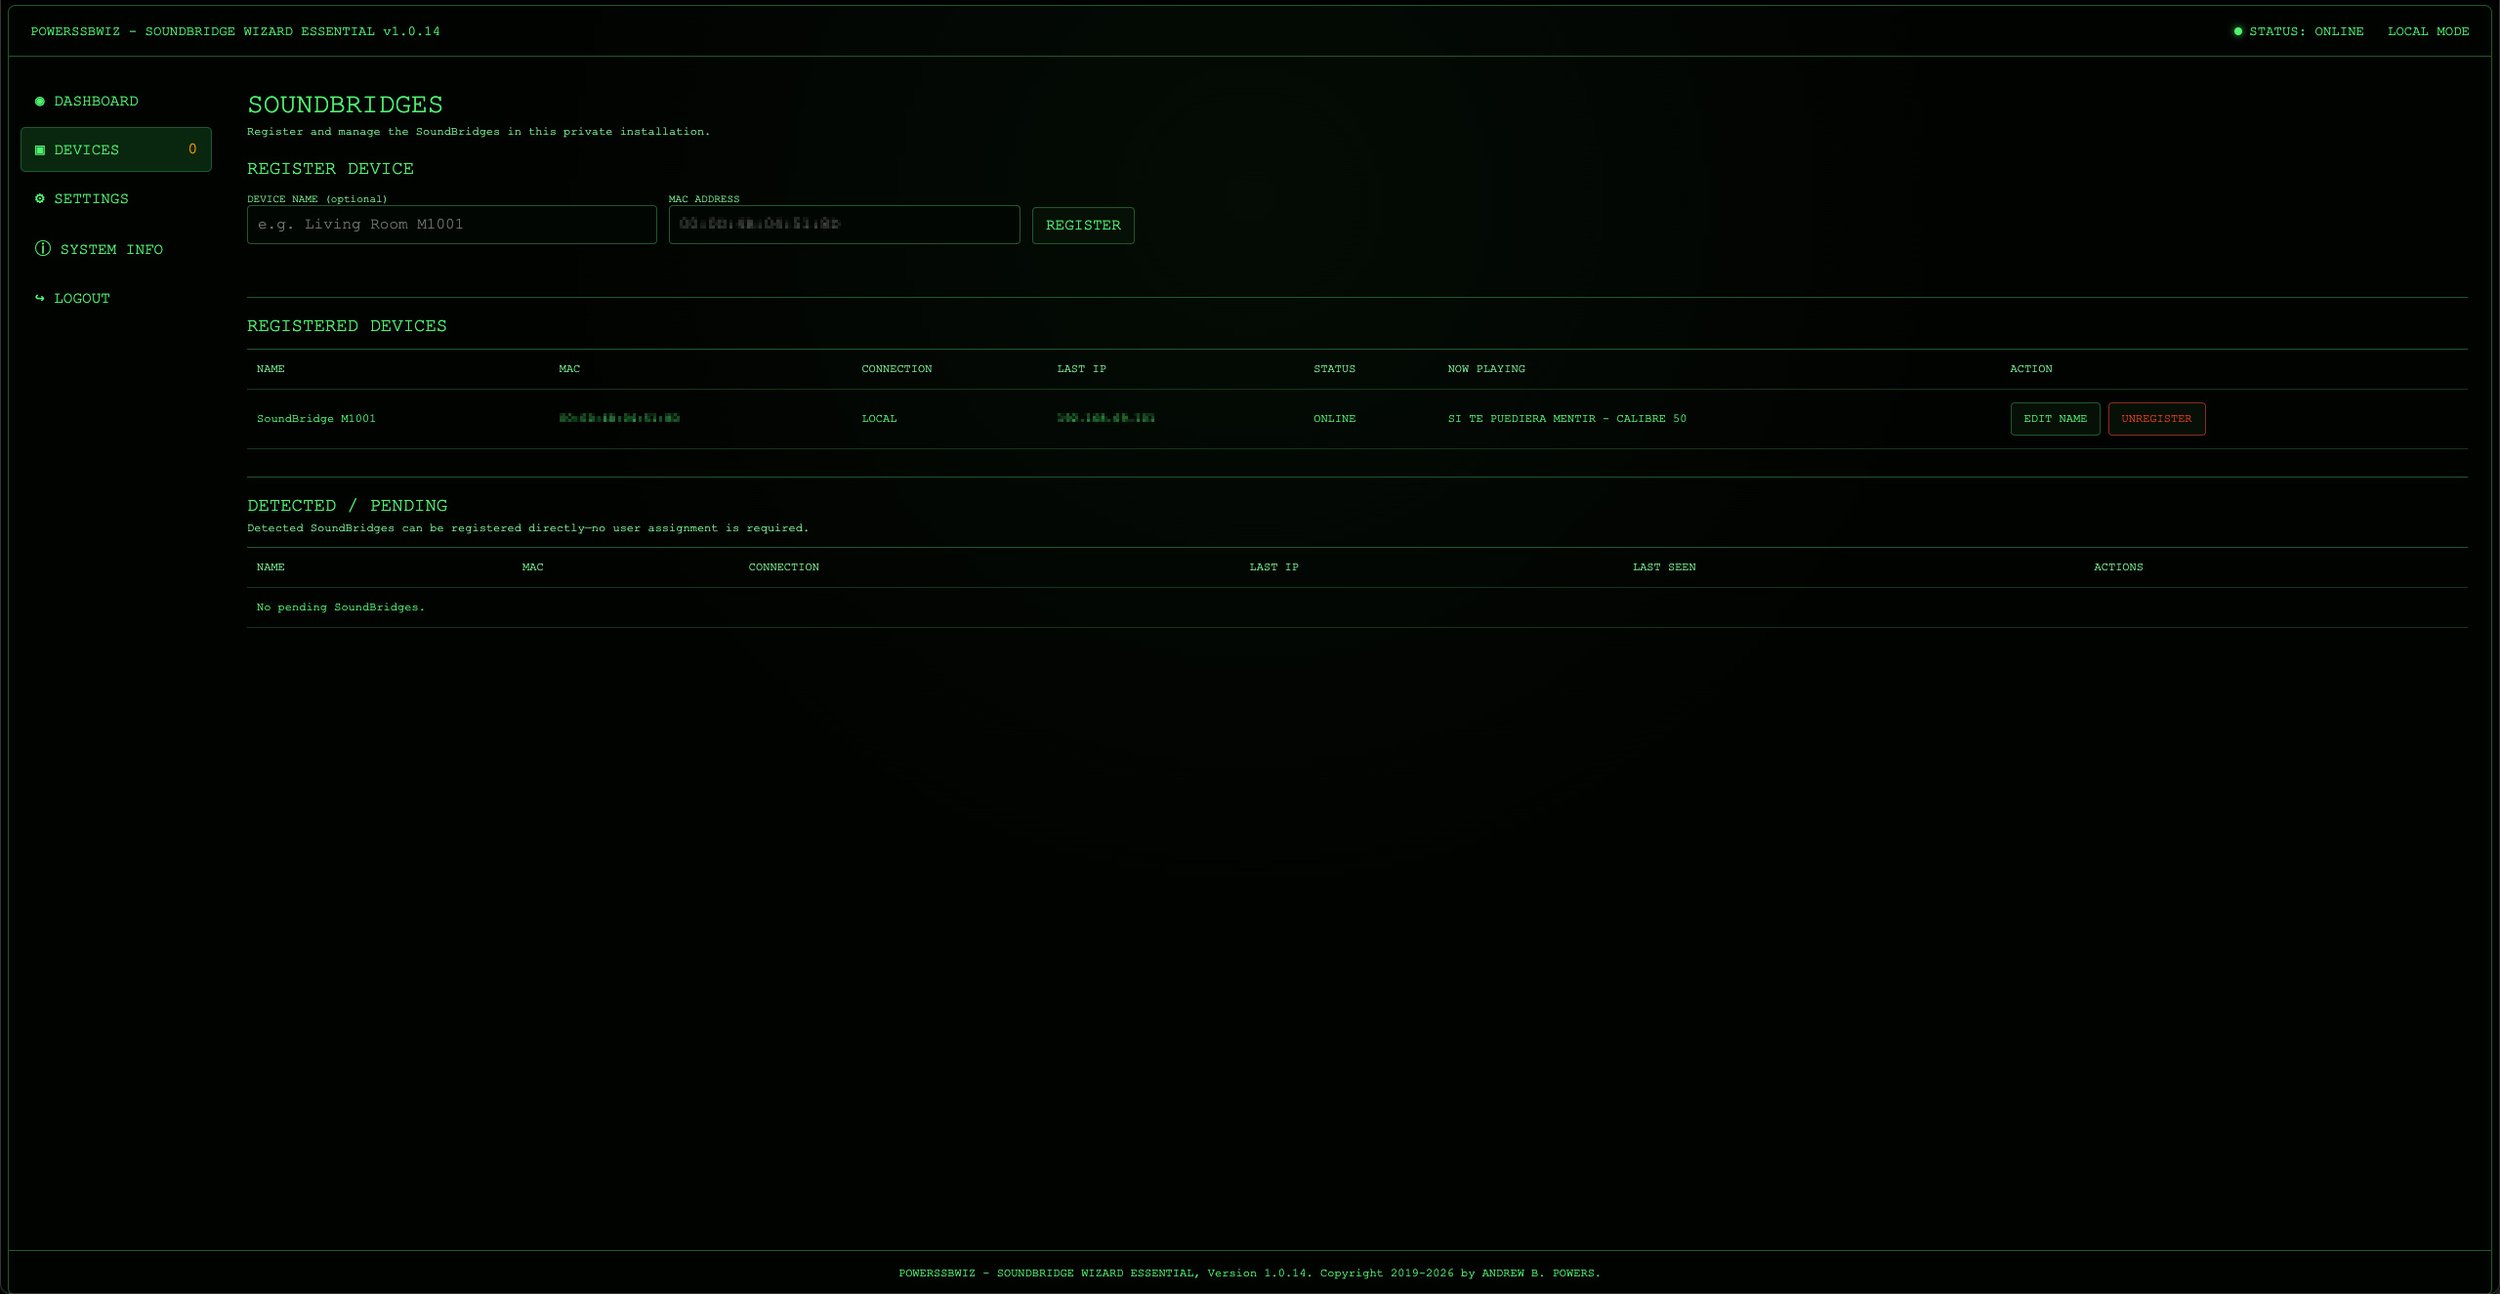
POWERSSBWIZ - SOUNDBRIDGE WIZARD ESSENTIAL - Devices

SETTINGS

This section contains the main configuration options for the local installation. It also includes the integrated backup and restore functions. Automatic backup intervals and the number of retained backup versions can be configured from the browser, while backups can also be created manually.

The backup area shows the configured backup location, whether automatic backups are enabled, the number of stored backups, the last successful backup, the next scheduled backup, and any reported backup error. Existing backup files can be downloaded, verified, restored, or deleted directly from the interface. An external backup ZIP file can also be selected and restored manually.
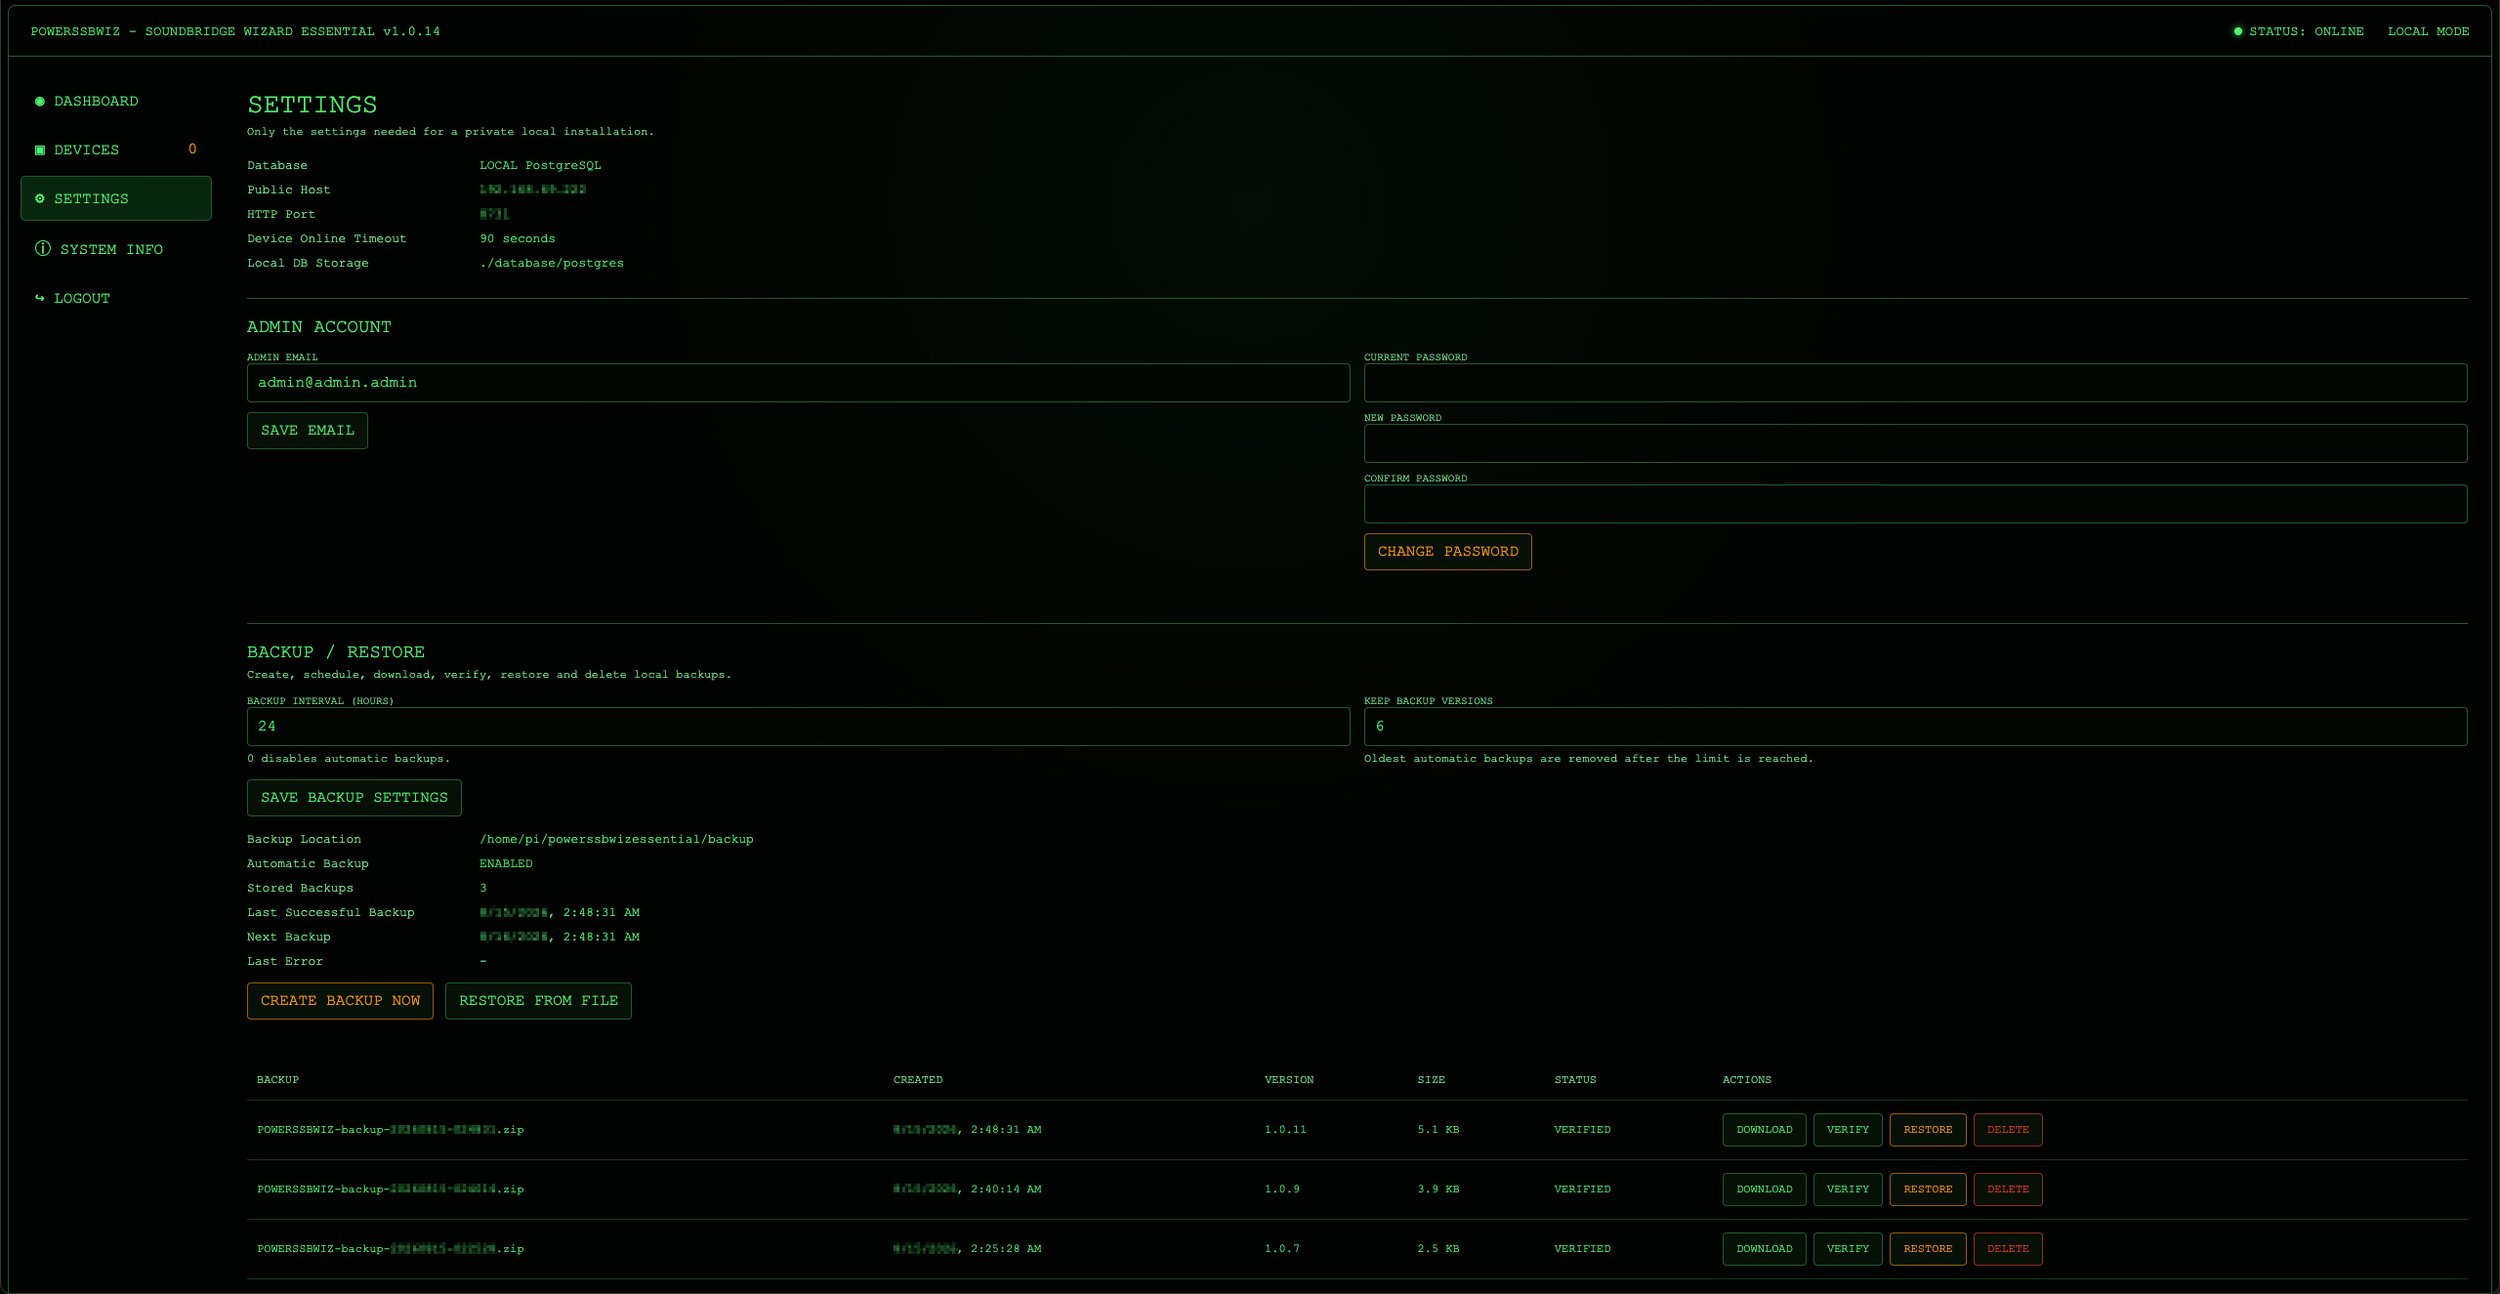
POWERSSBWIZ - SOUNDBRIDGE WIZARD ESSENTIAL - Settings

SYSTEM INFO

This section provides information about the running OWERSSBWIZ - SOUNDBRIDGE WIZARD ESSENTIAL installation and its environment, allowing important system details to be checked directly from the browser without opening a terminal.

It also contains the integrated SYSTEM LOG, which provides a simple view of recent SOUNDBRIDGE WIZARD runtime events. The log retention period can be configured directly from the web interface, and the complete log can be cleared manually when required.

Because the SYSTEM LOG is stored persistently in PostgreSQL, both the log entries and the configured retention setting are included in the normal SOUNDBRIDGE WIZARD backup. Restoring a backup therefore also restores the corresponding SYSTEM LOG and its retention configuration.
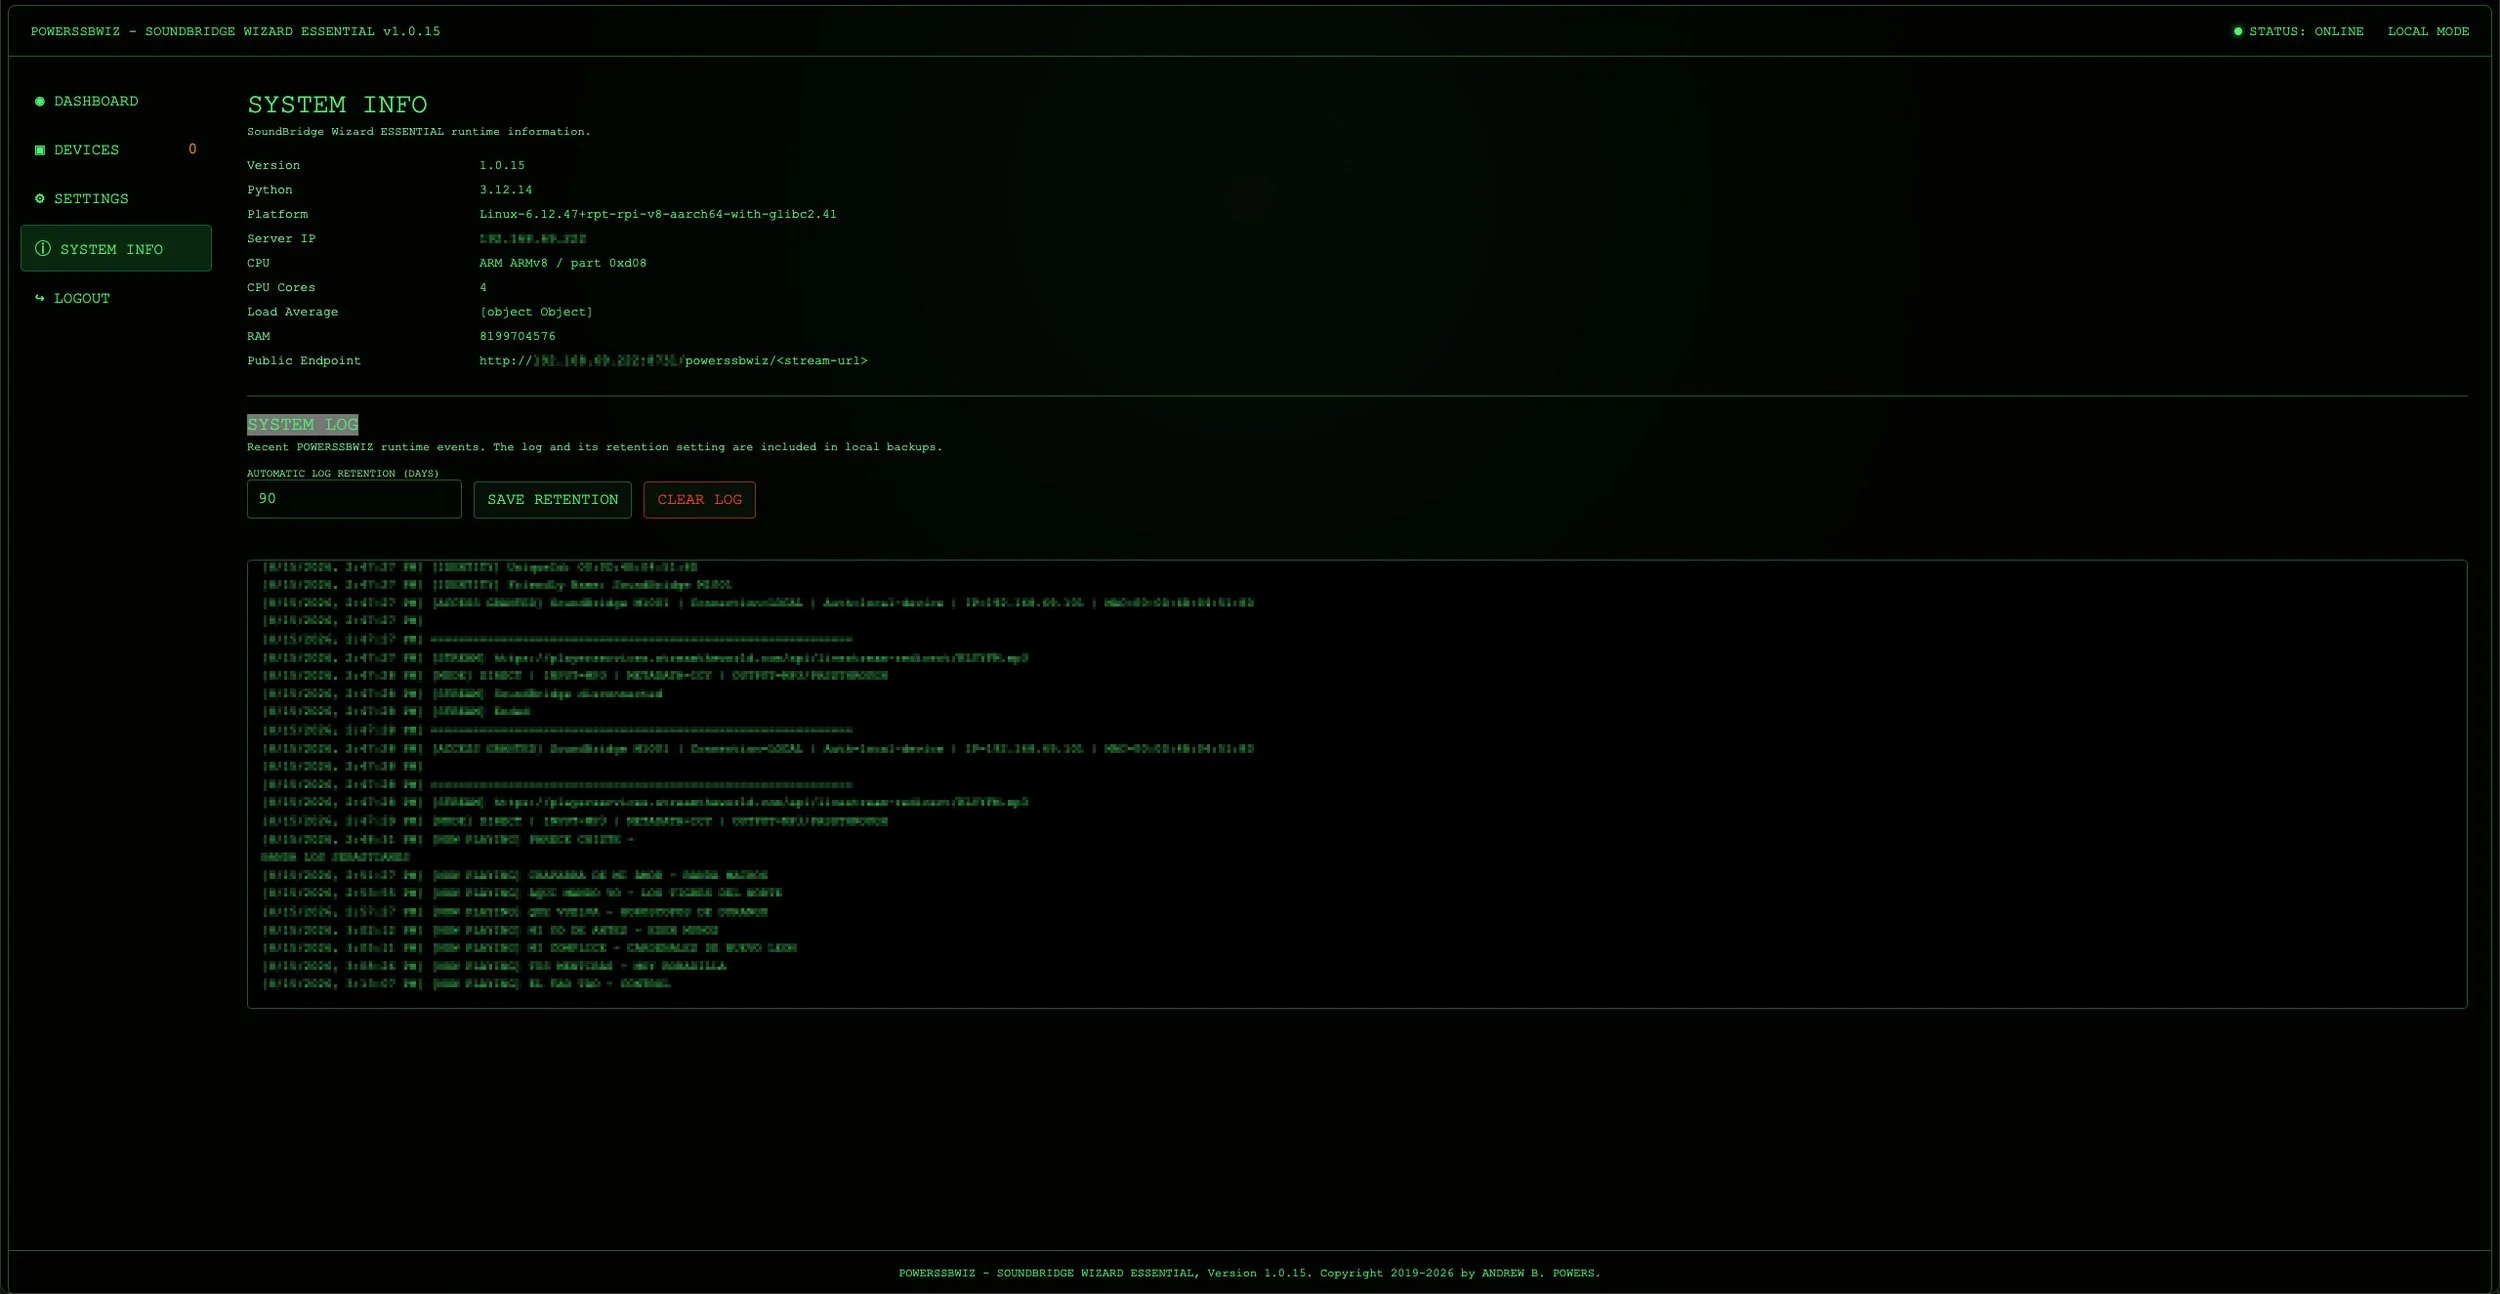
POWERSSBWIZ - SOUNDBRIDGE WIZARD ESSENTIAL - System Info

The SOUNDBRIDGE WIZARD ESSENTIAL interface is deliberately limited to the functions that are useful for operating a SoundBridge installation at home. Instead of exposing unnecessary administrative complexity, it brings device management, stream monitoring, configuration, backups, system logging, and system information together in one clear web interface.

soundbridge m1001 m1000 m2000 audio cabinet beastie_boy books vintage receiver mid century house palm springs powerssowi soundbridge wizard

Conclusion.

The project has evolved considerably from the original NGINX solution.
The first version primarily solved one specific problem:

HTTPS on the modern side, HTTP on the SoundBridge side.

The SOUNDBRIDGE WIZARD goes much further. It can analyze the stream itself, process ICY metadata, handle station information and StreamTitle, follow different stream behaviors, and use FFmpeg as an alternative processing path whenever direct relaying is not sufficient.

At the same time, the project has grown beyond the streaming relay itself. SoundBridge devices can be detected and registered, active playback can be monitored, detailed information about the current connection and stream is available directly through the integrated web interface, and important runtime events can be reviewed through the persistent System Log.

Configuration, device management, stream monitoring, system information, system logging, and backup and restore functions are all accessible from the browser, while the complete application runs as a self-contained Docker installation with a local PostgreSQL database.

What started as a simple HTTPS-to-HTTP workaround has therefore become a dedicated compatibility layer between modern Internet radio infrastructure and a network music player from another era.

And that was ultimately the goal: the SoundBridge should not have to know how the Internet has changed over the past twenty years. It should simply continue doing what it was built to do - playing music.

The POWERSSBWIZ - SOUNDBRIDGE WIZARD ESSENTIAL takes care of the rest!

Check out this SoundBridge blog post too

Do you have any recommendations or personal guidelines that you find helpful?

Please feel free to comment and share your thoughts on “Roku SoundBridge – Making the SoundBridge Wizard smarter”.


If you like my work or the free stuff and want to say thank you, please use this opportunity now and

THANK YOU, very much! 🙏🏻

If you have any questions, please drop me a message!
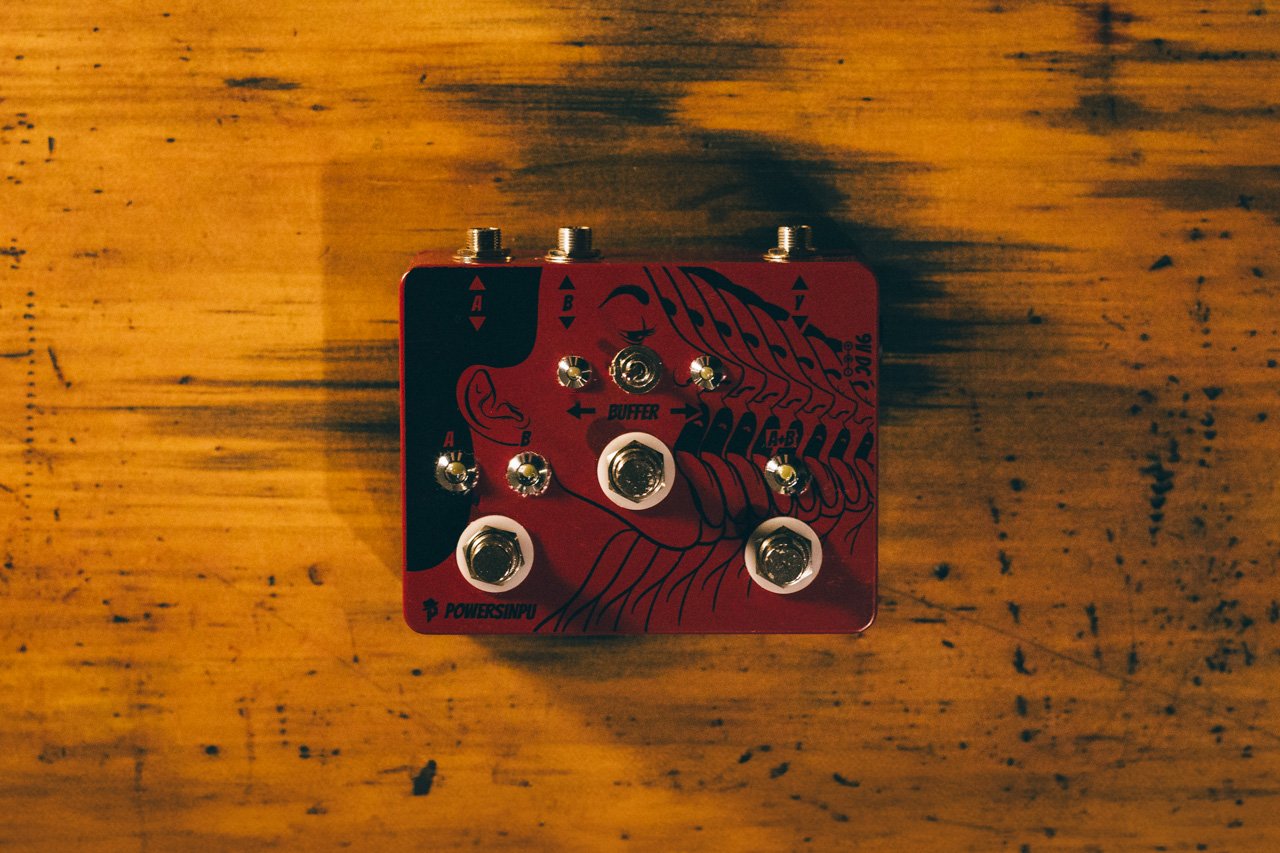

POWERSPEDAL “POWERSINPU - Infinite Purity“ (ABY Pedal with K Buffer) by Andrew B. Powers

You need a ABY pedal and you need a buffer. Yes, you really do! So why not get both?

This all-in-one ABY pedal with buffer is the perfect solution.

Ideal for guitarists who demand both versatility and pure tone, this all-in-one pedal truly stands out. Effortlessly switch between two amps or signal chains with the ABY function, while the integrated K Buffer keeps your guitar’s tone crisp, clear, and punchy – even across long cables and crowded pedalboards.

Infinite routing. Pure tone. Anywhere!

Whether you're splitting your signal or staying locked into a single path, you’ll experience consistent, transparent sound and bulletproof performance. The “POWERSINPU - Infinite Purity” is here to prove it - crafted to allow you flexible routing while keeping your tone tight, clear, and ready for any stage or studio.

If you're the kind of musician who thinks you don't need a buffer, you're not alone. But once you hear what it does, you'll wonder how you ever played without it.

ABY pedal function

Unlock versatile routing with this intuitive ABY feature. Seamlessly switch between two amps or signal paths to explore new tonal options, creative setups, or simple stage solutions. Whether you need to split your signal for stereo setups or switch between different rigs, the ABY function ensures rock-solid reliability and noiseless switching in a compact, pedalboard-friendly design.

If you’re wondering, ABY isn’t actually an abbreviation - it’s more of a visual reference. The “A” and “B” stand for the two amplifiers (or signal paths) you can switch between or use together. The “Y” represents the input signal entering the pedal and being split to both outputs.

You can easily switch between the two outputs A” or “B” using the switch on the left side of the pedal. Or, you can select “A+B” with the switch on the right side to send your signal to both outputs at the same time, projecting your sound through both amps simultaneously. The current switching status is also clearly indicated by three LEDs.

Classic K Buffer design

Your signal has a journey to make - don’t let it get lost!
This built-in K-Buffer preserves your guitar’s original signal strength, clarity, and punch from start to finish. Featuring the classic buffer architecture found in the legendary Klon Centaur, it is renowned for its transparency and tonal integrity.

Keep it alive, keep it clear!

To get the most out of it, run this buffer right at the start of your signal path. The buffer stays on at all times to protect your tone, while the “BUFFER” footswitch turns the main effect on and off. For the buffer function, it is necessary to select the signal direction using the toggle switch. The two LEDs clearly indicate which direction is active - either from the “A/B” jacks to the “Y” jack, or the other way around. When the buffer’s main effect is engaged, the two LEDs indicating signal direction flash rather than stay steadily lit, giving you an immediate and clear visual cue of the current status.

Get total signal control and uncompromising sound with the POWERSINPU – Infinite Purity pedal.

Key Features:
- Guitar effect pedal combining a K Buffer & ABY switch in a single enclosure
- Switches for ABY function (2x)
- On/off switch for main buffer effect
- Switch for signal direction
- Status LEDs (3x + 2x)
- Handcrafted
- Unique serial number

Specifications:
Power supply (not included): 9V DC
Inputs & outputs: 1/4" // 6.35mm TS (mono) jack (3x)
Dimensions (case): 4.75in x 2.61in x 1.42in // 121mm x 66mm x 36mm
Weight: 9.8oz // 280g

Box content:
- The “POWERSINPU - Infinite Purity“ ABY Pedal with K Buffer

Designed and handwired with ❤️ in the California and England.

Order yours today and experience the difference it can make in your audio setup!

Check out this great guitar effect pedals too


If you have any questions, please drop me a message!

POWERSBAPB “Black Ant Power Brick“ (Pedal Board Power Supply) by Andrew B. Powers

POWERSBAPB Black Ant Power Brick Pedal Board Power Supply

The “POWERSBAPB - Black Ant Power Brick“ is the ultimate power supply, designed for guitar and bass effect pedals

Batteries provide clean, isolated DC power, reducing the risk of ground loops and hum that can come from daisy-chained or poorly isolated power supplies. A 9V battery is low voltage and safe to handle, reducing the risk of electrical shock or damage to your pedal or guitar.

But if you power your effects pedals with 9V batteries, you know two things: they deliver great responsiveness—but they drain fast. Constantly tearing apart your pedalboard to swap batteries gets old quickly. That’s where the “POWERSBAPB - Black Ant Power Brick” comes in. It lets you enjoy the tone and feel of battery power - without the usual hassle.

The POWERSBAPB is a 6-channel, multi-voltage DC power supply

At first glance, the POWERSBAPB might appear to be a straightforward device - but there's some serious brilliance behind its design and impressive processing power under the hood.

POWERSBAPB Black Ant Power Brick Pedal Board Power Supply

The Black Ant - Power Brick is a rechargeable, universal guitar pedal power supply designed for all battery-operated effects. It features five independent 9V DC (center-negative, 2.1mm x 5.5mm) outputs (150mA each), with each channel equipped with its own short-circuit and over-current protection - ensuring that a fault in one output won’t affect the others.

POWERSBAPB Black Ant Power Brick Pedal Board Power Supply

In addition, there is one high-current output (300mA) that can be switched between 9V and 12V using a right side-mounted toggle switch. This switch is specially protected to prevent accidental voltage changes. A multicolor LED clearly indicates the selected voltage by displaying different colors.

POWERSBAPB Black Ant Power Brick Pedal Board Power Supply

Built with carefully selected components, this power supply offers lower noise operation and improved thermal performance, delivering clean and stable power with minimal heat generation.

Black Ant Power Brick - 8000mAh reliable, uninterrupted high-performance power, anywhere & anytime

The Black Ant Power Brick power supply system harnesses the unique advantages of LiPo (Lithium Polymer) batteries, which are capable of delivering high current output. This means that when your pedal - say, an overdrive - demands a surge of power, it gets it instantly, without any noticeable voltage drop. The result? Consistent, reliable performance from your effects, even under heavy load.

With its built-in 8000mAh battery, the POWERSBAPB keeps your rig powered through multiple gigs—no need to worry about running out of juice.

The Black Ant Power Brick can be quickly recharged via the convenient and widely adopted USB-C port located on its left side. While charging, a small red LED lights up to indicate the process. Once fully charged and ready to deliver hours of reliable power, the red LED turns off, signaling that the unit is ready for use as a standalone power source.

POWERSBAPB Black Ant Power Brick Pedal Board Power Supply

Since durability and sustainability are key priorities, the batteries are fully replaceable.

Dual power intelligence - Seamless switching between internal battery and external supply

Even when the battery runs low, the Black Ant Power Supply keeps your rig powered—either by directly supplying your connected effect pedals or by serving as a backup when an external power source is available. As soon as you plug an external power supply (center-negative, 2.1mm x 5.5mm) into the DC input, the unit automatically switches from battery to external power in a fraction of a second. The LED indicators change color to clearly show which power source is currently in use.

POWERSBAPB Black Ant Power Brick Pedal Board Power Supply

Rugged durability - ready to go wherever you play

Crafted from high-quality, heat-dissipating aluminum alloy, the Black Ant Power Brick case features a sturdy, solid structure built for durability that gives it a minimalist, stylish look. Thanks to its compact and lightweight design, it’s easy to carry wherever your music takes you.

POWERSBAPB Black Ant Power Brick Pedal Board Power Supply

Key Features:
- 6-Channel, isolated DC power supply
- One switchable multi-voltage (9V/12V) DC power output
- Short-circuit and over-current protection
- High capacity (8000mAh) battery for extended use and delivering consistent
- Quick recharge via USB-C
- Seamless dual power automatic source switching
- Rugged, durable design
- Multicolor status LEDs
- Handcrafted
- Unique serial number

Specifications:
Internal power supply: 8000mAh battery (replaceable)
External power supply: 9V DC
Inputs: 1x DC (center-negative, 2.1mm x 5.5mm), 1x USB-C
Outputs: 6x DC (5x 9V and 1x 9V/12V), center-negative, 2.1mm x 5.5mm
Dimensions (case): 4.75in x 3.7in x 1.34in // 121mm x 94mm x 34mm
Weight: 14.11oz // 401g

Box content:
- The "POWERSBAPB - Black Ant Power Brick” power supply

POWERSBAPB Black Ant Power Brick Pedal Board Power Supply

Designed and handwired with ❤️ in the California and England.

Order yours today and experience the difference it can make in your audio setup!

Check out this great guitar effect pedals too


If you have any questions, please drop me a message!
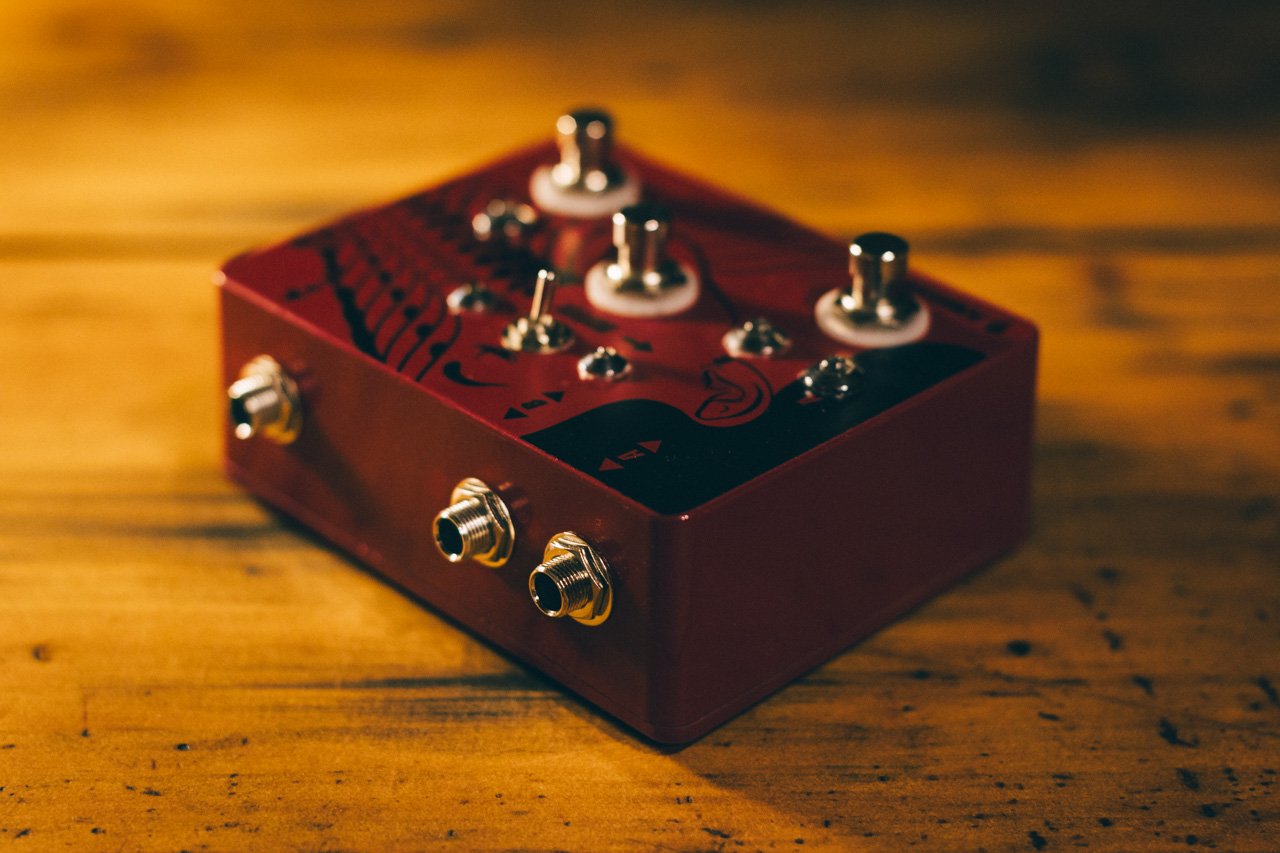
DaVinci Resolve - How to make audio sound better by Andrew B. Powers

DaVinci Resolve - How to make audio sound better

Here’s how I enhance audio quality in DaVinci Resolve’s Fairlight audio editor.

Whether I'm working on dialogues, interviews or voiceovera, I find Fairlight’s tools incredibly effective for making audio sound clear and professional.

Important reminder

Before exploring the tools, keep in mind that quality audio begins with solid recording practices. While DaVinci Resolve offers powerful audio enhancement features, it can’t perform miracles on poorly recorded sound. Strive to capture the best possible audio from the start to reduce the need for heavy correction in editing.

My step-by-step approach

To sound better, there are several essential principles that every editor, producer, and creator should consider. In this guide, I'll show you how to enhance your audio in DaVinci Resolve, exploring the different features that can significantly improve the quality of your recordings.

1.) Dialogue Processor

The Dialogue Processor offers a range of audio effects designed to enhance your recordings, including De-Rumble, De-Pop, De-Ess, Compressor, Expander and Excite. Each effect serves a unique purpose, so understanding their functions will help you choose the best adjustments for your specific audio needs.

De-Rumble

The De-Rumble effect is an audio processing tool designed to remove or reduce low-frequency rumble and unwanted bass noise from audio recordings. I use this effect to remove rumbling sounds, which are often caused by wind noise, handling noise on microphones, or vibrations from nearby machinery.

De-Pop

I use this effect in to remove strong popping noises from audio, especially in dialogue. Harsh “pop” sounds caused by plosive consonants like "p" and "b," which occur when air hits the microphone directly during speech. The De-Pop effectively minimizes or eliminates these distracting sounds, resulting in cleaner, more polished audio.

De-Esser

I use this to soften harsh “S” sounds by focusing on higher frequencies. I find that setting it to activate around 5.8/5.9 KHz helps reduce sibilance without dulling the audio too much.

  • Compressor: used to reduce loud parts of a recording

  • Expander: used to make quiet sections louder

  • Excite: used to enhance the high-end frequencies to make vocals crispier

When using the dialogue processor, it is important to know that you can turn on or off the effects listed above. So if you only need to remove sibilance in your audio, then just use De-esser and turn off the other tools.

Overall, this 6-in-1 audio effects tool inside DaVinci Resolve can be powerful enough to make specific adjustments to your audio.

2.) Dynamics

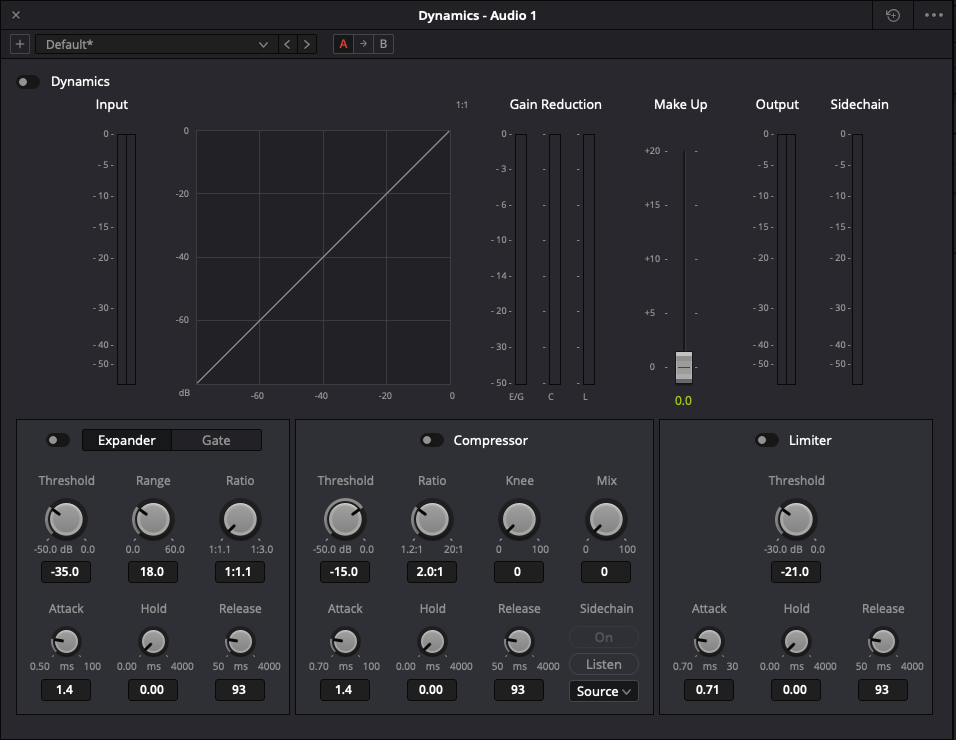
Another powerful tool in DaVinci is Dynamics, which functions similarly to the Dialogue Processor by offering multiple audio effects. These include an Expander, Compressor, and Limiter. While the Expander and Compressor work the same way as those in the Dialogue Processor, they are more user-friendly, with simplified controls for easier adjustments. The Limiter, on the other hand, is essential for managing audio peaks, ensuring a balanced and controlled sound.

The Dynamics tool is ideal when you want to focus primarily on using three key audio effects or gain better visibility and control over various settings. Additionally, similar to the Dialogue Processor, it allows you to disable any effects you don’t need.

3.) Equalizer

The third tool on our list for improving audio in DaVinci Resolve is the Equalizer. It lets you fine-tune the balance of different frequencies in your recording and allowing you to enhance or reduce specific tones to achieve the desired sound.

Equalizers can be challenging to use, especially for beginners. However, DaVinci Resolve offers ready-made presets that make it easy to enhance your audio quality instantly.

If you have a good understanding of audio frequencies, the Equalizer is a powerful tool for enhancing your sound. It allows you to eliminate low-end rumbles, apply a high-pass filter, and effortlessly boost the bass - all within a single tool.

Conclusion

DaVinci Resolve provides a variety of tools to enhance audio quality. The three tools mentioned above can be used together or individually, depending on what needs improvement and your familiarity with each one. Effective audio editing is about making subtle refinements rather than drastic changes. Take your time to experiment and find the best approach for your project.

Check out the following informations too

Do you have any recommendations or personal guidelines that you find helpful?

Please feel free to comment and share your thoughts on “DaVinci Resolve - How to make audio sound better”.


If you like my work or the free stuff and want to say thank you, please use this opportunity now and

 
Buy Me a Coffee at ko-fi.com
 

THANK YOU, very much! 🙏🏻


The Three Song Rule (First 3 songs, no flash) by Andrew B. Powers

Fall Out Boy - Guitarist Joseph "Joe" Trohman

You might have heard of the three song rule - "First three songs, no flash!"

But what does this rule really mean? Where did it originate, and how can you, as a concert photographer, make the most of your time in the photo pit while ensuring a smooth experience for everyone involved?

Background

The exact origins of the “Three Songs Rule” are a bit unclear, but it probably has its roots in the 1980s, particularly with bands performing in New York, with Bruce Springsteen often credited as a catalyst for its creation.

In those days, especially at large venues like Madison Square Garden, photo passes were given out liberally, often to paparazzi photographers who didn’t necessarily know how to shoot concerts properly. Many relied on flashes to capture their shots, and some were more interested in the thrill of being at the concert than in their photographic skills. With film cameras, they were limited to just 36 shots per roll, and many didn’t even know how to change film mid-concert.

When Bruce Springsteen took the stage, he was often met with a barrage of flashes from up to 60 photographers. The overwhelming light was not only disruptive but blinding, and Springsteen famously walked off stage one night, insisting that something had to change.

To address the issue, someone proposed a solution: limit photographers to the first fifteen minutes of the show. With most rock songs averaging around five minutes, this quickly became the “First three songs, no flash!” rule. It provided a manageable window for photographers to capture their shots while allowing the performance to continue uninterrupted afterward.

This era coincided with the rise of MTV (originally an initialism of Music Television) and artists became increasingly image-conscious. They wanted to control even more how they were portrayed, ensuring they looked polished and perfect - much like how they appeared in their music videos. The Three Song Rule not only reduced disruption during the show but also helped artists maintain a certain level of control over their public image during live performances.

Today, the rule has become an industry standard, shaping concert photography for decades.

Guidelines

While the rule sounds straightforward, the reality is that every venue and every concert is different, and there are exceptions and modifications to these guidelines.

So when you go to a venue and pick up your passes they will probably tell you right then about the rules. If they don’t and you haven’t heard otherwise, I would just assume “1st 3, flash free”.

Your job as a photographer is important, but it doesn’t make the show go on!
As a photographer, you're always in the way of the performance - whether it's for the band, the audience, or the crew. No one is ever in your way (except maybe another photographer), so the key is to stay professional and adaptable.

  • Know the rules

When you pick up your photo pass, the staff may inform you of specific rules for the night. If they don't, assume it’s the standard "first three songs, no flash." Don’t wait to be told, and certainly don’t assume otherwise unless you’ve been informed of a special arrangement.

  • Stay professional

It's tempting to think you’re the star when you're in the pit, but remember, you're there to do a job. Be mindful of the other photographers and the crew. The pit can get crowded, and it's easy to step on toes (sometimes literally). If you find yourself fighting for space, be polite, and don’t let ego get in the way. This is especially important because you’re all working within the same limited time window.

  • Stage pit issues

You’ll run into common problems, like limited space, challenging lighting, and restrictions on movement. Keep calm and work around these obstacles. It’s part of the job!

  • Be respectful

Always respect the crew, the artists, and your fellow photographers. You’re there to capture the performance, not to be part of the spectacle.

  • Mind the time

When the third song ends, get out of the pit quickly and without causing disruption. Your time is up, and the show continues for everyone else.

Conclusion

By staying professional, respecting the rules, and being prepared for the inevitable challenges that come with concert photography, you'll not only get the shots you need but also ensure you're welcomed back for future gigs. Remember, each venue is different, and while the rules are a good guideline, flexibility and professionalism will carry you far in this field.

Check out the following photography informations too

Do you have any recommendations or personal guidelines that you find helpful?

Please feel free to comment and share your thoughts on “The Three Song Rule (First 3 songs, no flash)”.


If you like my work or the free stuff and want to say thank you, please use this opportunity now and

 
Buy Me a Coffee at ko-fi.com
 

THANK YOU, very much! 🙏🏻


POWERSPEDAL “POWERSVOLA - Voodoo Lady“ (Fuzz Guitar Effect Pedal) by Andrew B. Powers

POWERSVOLA - "Voodoo Lady", Fuzz Guitar Effect Pedal

The “POWERSVOLA - Voodoo Lady” - The only version Jimi Hendrix would have ever played!

The very dirty fuzz sound and iconic octave-up effect of this pedal is a must-have for guitarists seeking that legendary tone. This effect pedal delivers the unmistakable and iconic sound defined by Jimi Hendrix and Stevie Ray Vaughan. With this pedal, you too can create the raw, powerful sounds that have shaped rock history.

Featuring two switches - one foot switch for on/off bypass and one toggle switch for disables the octave for a more traditional fuzz effect, this pedal offers versatility at your feet.

POWERSVOLA - "Voodoo Lady", Fuzz Guitar Effect Pedal

The “POWERSVOLA - Voodoo Lady” stands apart for its unique circuit!

This special design, using a transformer to create the iconic octave-up effect, is the same type of circuit that Jimi Hendrix exclusively played throughout his career and making it synonymous with his legendary sound. Unlike later transistor versions, this circuit retains the raw, gritty character that defined Hendrix's tone.

Adorned with psychedelic artwork, this pedal is a visual and sonic celebration of the ‘60s.

POWERSVOLA - "Voodoo Lady", Fuzz Guitar Effect Pedal

Key Features:
- Controls: VOLUME and FUZZ, Octave-Up effect
- True-bypass switch
- Status LED
- Handcrafted
- Unique serial number

Specifications:
Power supply (not included): 9V DC
Input: 1/4" // 6.35mm TS (mono) jack
Output: 1/4" // 6.35mm TS (mono) jack
Dimensions (case): 4.75in x 2.61in x 1.42in // 121mm x 66mm x 36mm
Weight: 9.8oz // 280g

Box content:
- The "POWERSVOLA - Voodoo Lady” guitar effect pedal

POWERSVOLA - "Voodoo Lady", Fuzz Guitar Effect Pedal

Designed and handwired with ❤️ in the California and England.

Order yours today and experience the difference it can make in your audio setup!

Check out this great guitar effect pedals too


If you have any questions, please drop me a message!
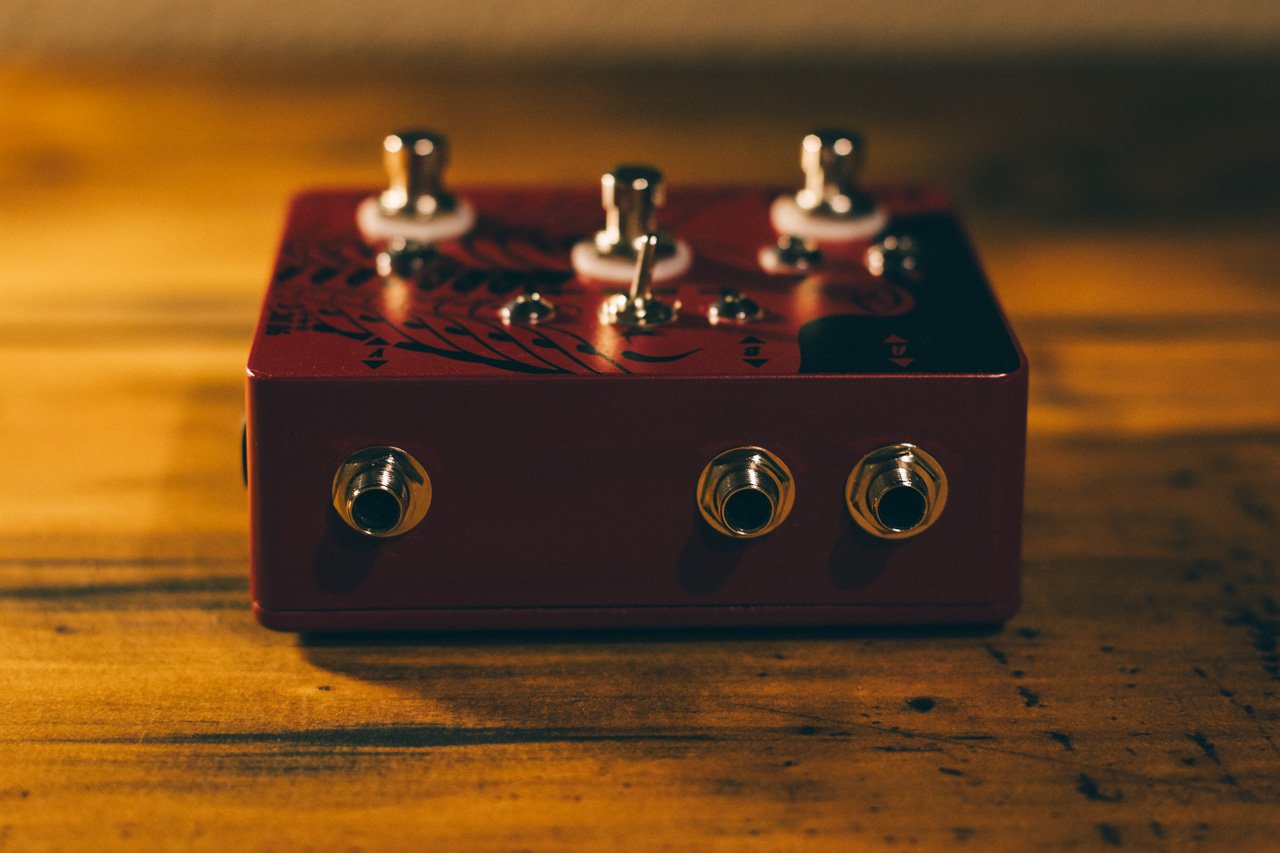
10 Basic music photography tips - Concert photography 101 by Andrew B. Powers

New to the world of live music photography?


Here are ten essential concert photography tips every new live music shooter should know, whether you're shooting from the crowd or just scored your first photo pass.

Think of this as a follow-up to the completely non-technical post, “6 Tips Every New Music Photographer Should Know” – but if you are new to music photography, be sure to check out that post as well.

Here are 10 simple, tips anyone can use for live music photography - but don't worry, they're all simple and no fancy photo equipment required.

1) RAW

Shooting in RAW provides the greatest flexibility and the highest image quality. With the cost of flash memory and hard drive space so affordable, there's little reason not to shoot in RAW. If you're more comfortable with JPG, consider shooting in RAW + JPG to ensure you're fully prepared for both immediate use and future needs, maximizing the quality of your images.

2) Auto White Balance (AWB)

People often ask what white balance (WB) should be set, but there is no specific Kelvin temperature - if you use the automatic white balance, this is always a good choice. For most indoor shows, auto WB generally gets you in the right range, with the occasional exception of very powerful mono-color LED lighting or mixed light sources. If you're shooting in RAW, you can easily adjust the color temperature later with minimal impact on image quality.

3) ISO

Don’t be afraid to crank the ISO!
While higher ISO can introduce noise, a sharp, grainy image is far better than a blurry, noiseless one. If noise is your biggest concern, it means you’ve done everything else right. With early digital cameras, noise was very pronounced even at low ISO values. But the noise produced by most modern cameras at high ISOs values is absolutely acceptable.

4) Autofocus

Contrast is everything with accurate autofocus. In low light, autofocus errors often arise from competition with higher contrast objects, like lights behind your subject or nearby objects like microphones. AF sensors can lock onto these false targets because they’re larger than indicated in the viewfinder. To avoid this, Giving potential competition a wide berth or changing your angle slightly to give the clearest view to your intended point of focus. For precise focus, target high contrast areas. This might mean autofocusing on a pattern on a subject's shirt instead of their face, or a sharp shadow on their ear instead of the eyes. Make sure they as close to the same distance away from the lens as your intended point of focus. This will improve focus accuracy and give better results.

5) Shutter speeds

Shutter speed dictates how motion appears in your photos. The more active and energetic the artist, the faster your shutter speed will need to be in order to freeze the action. Try to maintain a shutter speed of 1/200 or faster. Anything slower can start producing blurred images. Of course there will be some exceptions to the rule. For very dynamic and high-energy artists, the shutter speed should be as fast as possible. A calmer singer/songwriter sitting still, you can go slower, like 1/80. However, the deliberate use of slow shutter speeds and the resulting motion blur can also be used to create very dynamic images of moving subjects.

6) Aperture

Concerts usually have a quite poor lighting situation, especially in small venues, so it is crucial to set your aperture to the smallest number on your lens e.g. f1.8 or f2.8 (which reflects a big aperture). This allows the most possible light to enter the camera sensor. The best prime lenses generally have an aperture of f1.2, f1.4 or f1.8 whereas good zoom lenses usually have an aperture of f/2.8 and is therefore work great in low light concert photography. That's why it's important to invest in fast lenses when you first start in concert photography. For beginners on a budget, a 50mm f1.8 is always a no-brainer, and is not only a great lens for concert photography, but also perfect for portrait photography.

7) Burst mode

Set your camera to multi-shot (burst) mode. This allows you to rapidly shoot at least three, four or five frames per second (fps) in a row. Modern cameras can also take 10 fps, 11 fps or much more. This increases your chances of getting at least one razor-sharp photo out of several, especially with fast-moving subjects. While not essential, this setting can be a big help, especially when starting out in concert photography.

8) Manual Mode

Apart from strobes and other very short duration lighting effects, most concert lighting stays fairly consistent. Shooting in manual mode allows you to maintain full control of the light around you and helping you to achieve consistent, repeatable results. Sudden changes of bright and low light can easily throw a camera off course and lead to incorrect exposures. Light meters can be misleading and are rarely accurate for every scene or situation. This is especially true in concert photography, where unpredictable lighting makes it even more important to trust your instincts and experience.

9) Flash

In general, you are not allowed to use a flash when shooting concerts. For good reason!
Imagine what it's like when several photographers burst their flashes almost simultaneously - this can be very distracting and quite annoying for the artist on stage. This is probably one of the reasons why there is a “NO FLASH” rule in the stage pits. I always recommend learning to work with the available light, as it’s a key skill in concert photography. And while I don't generally recommend the use of flash in most cases, it's worth experimenting with it to see what results you can achieve if the artist is okay with it. In small, low-light venues, flash can be a game-changer - for example in capturing high-energy jumps with incredible clarity.

For more background informations about ➡️➡️➡️ “The Three Song Rule (First 3 songs, no flash)”!

10) Earplugs

This is the one equipment recommendation I’m going to make - it’s not optional, it’s a must!

Forget everyhting about better photo equipment if your ears are overwhelmed by eardrum-crushing decibels. I highly recommend earplugs for new shooters! Most earplugs are affordable, comfortable, and offer solid noise reduction.

When I was young, I thought it was cool to be at clubs and concerts without earplugs, enjoying the loud music in front of the speakers. Seeing security with foam earplugs seemed uncool, and though my ears would ring after every show, I figured it was just part of Rock n' Roll. I was wrong!

I learned about hearing damage when I found out musicians like Neil Young and Bono suffer from tinnitus - a constant ringing caused by loud music. Spending just 30 minutes in a noisy club can harm your hearing, and rock concerts are even worse.

So don't be an idiot and protect your ears!

For your safety: ➡️➡️➡️ Read my review of these extremely effective plugs!

Conclusion

Now you have it - my 10 essential tips that most pros follow every time they're in the stage pit, but which might not be obvious to new music photographers. Even better is that you can apply these tips regardless of the photographic equipment you use. Whether you're using a point-and-shoot camera or a high-end DSLR/mirrorless.

Check out the following photography informations too

Do you have any recommendations or personal guidelines that you find helpful?

Please feel free to comment and share your thoughts on “10 basic music photography tips - Concert photography 101”.


If you like my work or the free stuff and want to say thank you, please use this opportunity now and

 
Buy Me a Coffee at ko-fi.com
 

THANK YOU, very much! 🙏🏻


POWERSPEDAL “POWERSMIRA - Mighty Rats“ (Distortion Guitar Effect Pedal) by Andrew B. Powers

POWERSMIRA - Mighty Rats

The “POWERSMIRA - Mighty Rats” effect pedal is the ultimate tribute to 40+ years of RAT evolution and its impact on guitar’s sound.

This pedal is more than just a distortion box, it is the secret weapon for real musicians who think of 60's garage rock, early punk or simply the bands that changed the sound of rock 'n' roll. Artists from every genre have used this iconic and unassuming black box to create their tones, including the Eagles, Jeff Beck, Nirvana, Metallica, Pink Floyd, REM and Radiohead.

The POWERSMIRA - Mighty Rats offers intuitive control over the core aspects of your tone

The DISTORT. knob adjusts the gain or the amount of distortion applied to your signal. Turning it up increases the saturation, producing more aggressive, overdriven tones, while lowering it gives a cleaner, less distorted sound. The VOLUME knob controls the overall output of the pedal, allowing you to adjust the loudness to match your desired level without affecting the tone. The FILTER knob acting as a low-pass filter, this control allows you to shape the tonal brightness of the effect. Depending on the position, more high frequencies are let through, which brightens the sound, or higher frequencies are attenuated, which results in a darker sound.

The simplicity of these controls makes the “Mighty Rats” easy to dial in for a wide range of awesome distortion tones.

The toggle switch toggles between the ANGRY and FAT versions. As you change the mode, the analog circuitry is rewired between different values of resistors, capacitors, diodes, and op-amps.

The POWERSMIRA - Mighty Rats modes

  • ANGRY

    The ANGRY mode highlights its key characteristics, emphasizing hard-clipping, scooped mid-range frequencies and a brighter tone, so you’ll have no trouble being heard through the mix. Since the circuit was designed around the musical distortion, it retains these qualities without sounding harsh.

  • FAT

    The FAT mode use of germanium clipping diodes is indeed a key factor in producing its signature tone. These diodes give it a warmer, more vintage sound that balances well between the aggression of distortion and the richness of fuzz. It's an iconic choice for guitarists who appreciate both tonal clarity and warmth.

Key Features:
- Controls: DISTORTION, VOLUME and FILTER
- Switch for ANGRY and FAT mode
- True-bypass switch
- Status LED
- Handcrafted
- Unique serial number

Specifications:
Power supply (not included): 9V DC
Input: 1/4" // 6.35mm TS (mono) jack
Output: 1/4" // 6.35mm TS (mono) jack
Dimensions (case): 4.75in x 2.61in x 1.42in // 121mm x 66mm x 36mm
Weight: 9.6oz // 271g

Box content:
- The "POWERSMIRA - Mighty Rats” guitar effect pedal

POWERSMIRA - Mighty Rats

Designed and handwired with ❤️ in the California and England.

Order yours today and experience the difference it can make in your audio setup!

Check out this great guitar effect pedals too


If you have any questions, please drop me a message!
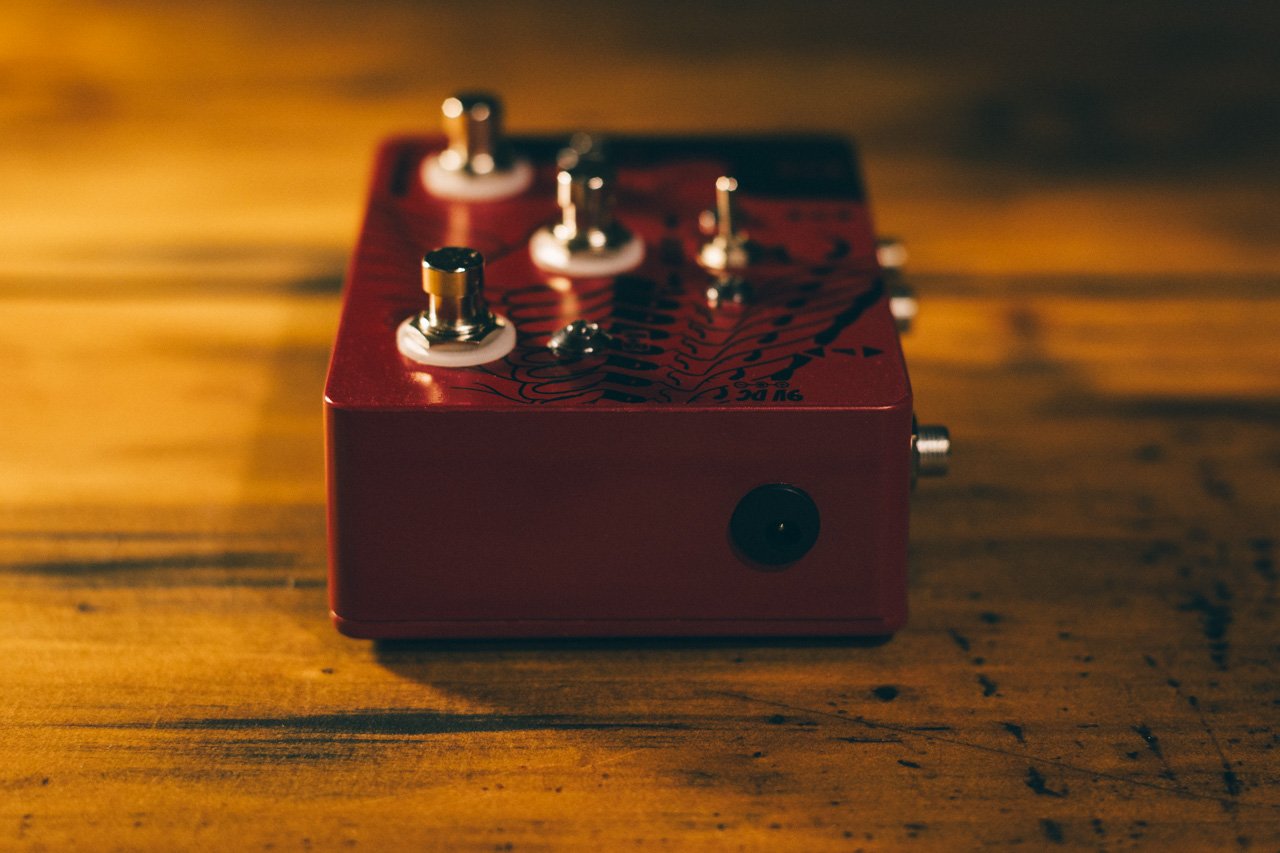
POWERSPEDAL “POWERSVICJ - Vicious Joker“ (Overdrive Guitar Effect Pedal) by Andrew B. Powers

The “POWERSVICJ - Vicious Joker” - Channel your inner Tony Iommi with this awesome overdrive effect pedal.

"POWERSVICJ - Vicious Joker”, a guitar pedal effect (from the POWERSPEDAL series) meticulously crafted by myself, delivering a sound that channels the power and mystique of classic British metal. Inspired by the legendary raw power of vintage Black Sabbath tones.

The “POWERSVICJ - Vicious Joker” is like no other!

Designed around the classic Rangemaster circuit, coupled with a Laney Preamp voiced together, with the end result being this beastly effect pedal and features four controls: PRESENCE, GAIN, PRESENCE, VOL. and RANGE.

These controls let you dial in your desired tone, from the treble-boosted rawness of the Rangemaster to the full-range roar of the Laney Supergroup. One of the standout features of this pedal is the RANGE control, which allows you to modulate the treble-boost section of the circuit and achieve a continuously variable frequency respo

Key Features:
- Controls: PRESENCE, GAIN, VOL. and RANGE (allows for continuously variable frequency response)
- True-bypass switch
- Status LED
- Handcrafted
- Unique serial number

Specifications:
Power supply (not included): 9V DC
Input: 1/4" // 6.35mm TS (mono) jack
Output: 1/4" // 6.35mm TS (mono) jack
Dimensions (case): 4.75in x 2.61in x 1.42in // 121mm x 66mm x 36mm
Weight: 9.9oz // 283g

Box content:
- The "POWERSVICJ - Vicious Joker” guitar effect pedal

Designed and handwired with ❤️ in the California and England.

Order yours today and experience the difference it can make in your audio setup!

Check out this great guitar effect pedals too


If you have any questions, please drop me a message!
The great stage pit etiquette guide for music photographers by Andrew B. Powers

In the past, I've written about the stage pit etiquette, focusing on general courtesies in music photography. These include considerations like maintaining proximity with fellow photographers, handling your gear, and moving with minimal disruption. However, the scope of concert photography etiquette extends far beyond these unspoken norms.

Moving beyond the practical tips I've shared, let's dive into some deeper aspects of stage pit (NOT “photo pit”) behavior that every music photographer should be aware of. I'm talking about the biases, and instances of disrespect that can pop up based on factors like gender, race, appearance, or even the photo gear you're lugging around. These things aren't limited to just music photography - sometimes in the stage pit, it's kinda like a mini version of the whole wide society out there.

R-E-S-P-E-C-T

So, here's the deal: We, as music photographers, need to step up our game. Let's make it a goal to constantly improve our behavior and actions. Well, it kicks off with one simple thing – respect for all your fellow photographers.

Equality

When you enter the stage pit, judgments and biases should be left outside. Upon entering the stage pit, remember, everyone has equal rights to be there and perform their work. Every individual sporting a photo pass is subject to the same rules and enjoys the same access.

The camera gear, age, attire, or any other factor should hold absolutely no weight. When the show is done, it's solely the quality of the images that carries significance. That's the true measure of our work, no question about it.

Awkwardness

It might sound obvious, but let's be absolutely clear - there's no room for weird behavior in the stage pit. Photographers are there to do their job and capture great images. That's the sole focus. Nobody's looking for a date in the stage pit or wants to talk about politics, religion, etc..

Behavior

Regardless of your client, whether it's a renowned publication like The Rolling Stone or even just a very famous artist, it's crucial to recognize that your images aren't inherently more valuable than anyone else's. Gatekeepers have diligently reviewed and approved photographers across the board, from well-established daily newspapers to prestigious national and international magazines to up-and-coming blogs.

In essence, if you're not granted special access, it's because you're on the same footing as everyone else. Special access is reserved for those who genuinely hold a distinct status or role. If you were truly very special, you'd get special access pass, like "Access all areas". If you're sporting the same pass as your fellow photographers, your entitlement is no greater and no lesser than every other photographer.

“Hello… !”

It's a simple gesture, but saying "Hello!" to a fellow photographer in the stage pit you've never met before can have a significant impact. Why? Well, despite photographers often being seen as lone wolves, this is how you can begin building a sense of community and fostering camaraderie.

Moreover, connecting with other photographers can shift your perspective. Engaging in a simple chat can help dispel the notion that they're your hostile competitors. It might seem like a small change, but this can do wonders for your mental well-being.

If you spot someone new, strike up a conversation. Ask them if they've shot in that venue before or if they've seen the band perform. If you're a regular at the venue or familiar with everyone else, make an effort to talk to the unfamiliar face. And if you're the newcomer, approach someone who seems well-acquainted with others. You don't have to become best buddies with everyone in the stage pit – but why choose enmity?

Photo gear

The camera gear you bring should never dictate how you're treated in the stage pit. The way you behave and show respect to others should remain entirely separate from the cameras or lenses you use. Let's ensure that any form of prejudice, homophobia, sexism or racism disappears at the very latest when you pick up your photo pass.

We're all aware that high-end camera gear can make the job more convenient, but it doesn't automatically elevate your status and your skills as a photographer. Your true talent is demonstrated solely through the quality of your photos, not by the size of your lens.

Mansplaining

Here's a straightforward request: Men, let's put an end to doling out unsolicited photography advice to women or anyone, really. Instead of appearing helpful, it often comes across as condescending.

When it comes to evaluating a photographer's skill, there's only one thing to look at - their images. Nothing else can truly speak to their level of expertise. Not their gender, height, race, personal relationships, age, faith, or appearance. Not their publications or whether they're getting paid. Even the gear they use is beside the point.

Speak up for others

If you see any of the objectionable behavior above, raise your voice. Whether it's from another photographer or a security guard speak up - because all should also know better.

When you see another photographer hassling a fellow photographer, speak up. If you notice security unfairly targeting women in the stage pit, don't hesitate to voice your objections.

Never condone disrespect or abuse when it's in your sight!
Take a stand for those who might struggle to raise their voices or perhaps too fragile to do so. This action becomes particularly significant if you're familiar with the person responsible.

Again, respect!

It's worth emphasizing - respect is the golden rule in the stage pit. Every action within that pit should be grounded in respect. Respect for your fellow photographers, respect for the artists gracing the stage, respect for the fans, and respect for all the individuals laboring to make the event happen. There are no exemptions to this principle!

Conclusion

If you're a music photographer, you're likely aware that many aspects of etiquette ultimately boil down to one core principle: RESPECT!
These aren't just practices exclusive to music photographers; they extend far beyond the confines of the stage pit.

The world of music photography is a community that we all collectively shape. In this community, ignorance and prejudice have no place. Concert photography etiquette is the linchpin that enables us to do out jobs effectively and with fun.

I implore all music photographers not only to envision the kind of community they wish to be part of but also to actively confront any wrongdoing they encounter. It could be as "minor" as someone belittling another photographer for their gear, questioning their credentials or because they are a woman. However, music photography community can only get stronger, when we establish an inclusive space, where everyone has the opportunity to thrive.

Do you have any recommendations or personal guidelines that you find helpful?

Please feel free to comment and share your thoughts on “The great stage pit etiquette guide for music photographers”.

More knowledge

If you haven't had a chance to read it yet, I encourage you to explore my article titled "101 stage pit etiquette for music photographers". It offers a wealth of additional tips and guidance on navigating the practical behavior in stage pits, especially when you are working in a big crowd of photographers.


If you like my work or the free stuff and want to say thank you, please use this opportunity now and

 
Buy Me a Coffee at ko-fi.com
 

THANK YOU, very much! 🙏🏻